Release Notes 2023.1.4.0
The April 5, 2023 release of the GlobalLink Vasont Inspire CCMS and Publish Server is available!
What's in this release?
Inspire 2023.1.4.0
- Enhancements to content authoring
- Enhancements to component management
- Enhancements to project management
- Enhancements to translation management
- Enhancements to publishing
- Enhancements to administration

Publish Server 2023.1.4.0
 If you have trouble accessing GlobalLink Vasont Inspire features, you might need to clear your browser cache.
- Press Ctrl+Shift+Del.
- From the Time range list, select All time, and then select all checkboxes.
- Close the browser.
- Try to access Inspire again.
Inspire Release 2023.1.4.0
Enhancements to content authoring
Insert a self-referencing link
When working in the Oxygen XML editor:
- If you create a cross-reference to content in a separate file, the file name is included:
<filename>#<rootid>/<elementid> - If you create a cross-reference to content that exists in the same file, DITA assumes it's the same, so the file name is dropped:
#<rootid>/<elementid>
When working in the Components browser, if you open  the Options menu and select Manage Relationships, the same cross-reference formats are used if you select:
 Auto repair
- Rebuild All Relationships
For more details, read:
Look in the left side panel to see DITA maps
When working in the Oxygen XML editor, specifying the correct root map helps to prevent validation problems when you work with keyrefs and also acts as the foundation for content completion.
Previously, you could specify the correct root map using the  Show DITA Maps option in the top Oxygen toolbar.

Now, you can specify the correct root map using the Show DITA Maps option in the left side panel.
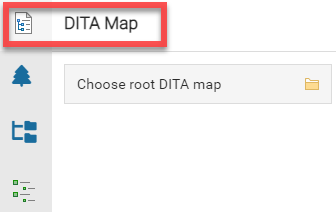
For more details, read: Choose a root DITA map in Oxygen.
Enhancements to component management
Open favorite components from the Dashboard
When you log into Inspire, the Dashboard tab always opens first so that you can access your recent work quickly.
- The Dashboard includes a Favorite Components panel to give you quick access to components and manage the list.
 You can now click the name of the file in the panel to open it in Oxygen for editing.
For more details, read: Go to frequently used favorite components.
Compare snapshots only when there are content changes
When you compare the original version with its historical snapshots in Oxygen, you can only select a snapshot where there are content changes.
- If you select a snapshot where there were no content changes, you won't be able to click the Select button.
- To know if there are content changes, after you select Compare with... and History, look in the Content Changed column.
In the Components browser, you must select a version for comparison that has content changes.
- On the Component Details screen, on the History tab, the Compare content option is only available when you select two snapshots that both have content changes (Content Changed column is Yes).
- On the Component Details screen, on the History tab, the Compare content to recent component option is only available when you select a snapshot that has content changes (Content Changed column is Yes).
For more details, read:
Save a copy of a component with select references
You can create a component by saving a copy of one that already exists.
- You can quickly save a copy and all of its references and permissions using the Save as... option.
- If you want to choose which references to save from the original component to the new copy, you can use the new Save as copy... option.
- If you want to choose which references are included and maintain relationships with the copy, you can choose to use the Save as branch option.
When you select the Save as copy... option, you can choose references on the Save as copy screen:
- This option lets you select whether the new copy maintains all, some, or no content referenced in the original component.
- This option does not maintain relationships between the original component and the copy. If you need that feature, use the Save as branch option.
- By default, the Component Name is set to be the same as the original component.
- While creating the copy, you can add a Label, which creates a Component Name of Component Name_Label.
- After the copy is created in the Components browser, you can use the Rename option to enter a new unique name using 100 characters or less.
For more details, read: Choose how to save a copy of a component.
See a better error message when you can't lock multiple components at once
Previously, if:
- A non-admin user opens the Components tab.
- The user selects multiple components and sees them in the Selected Components pane.
- The user has only Read permission to one of the selected components.
- The user clicks Lock.
The user sees an undefined error, but it doesn't tell them the reason they can't lock the components.
Now, the user sees a better explanation: The user does not have permission to one or more components for the request.
For more details, read: Lock components from the components browser.
See the Completeness Report option in the overflow menu
Previously, if you:
- Click Components.
- In the Folders pane, navigate to the folder where you've saved the components.
- In the Components pane, find the components you want to check.
- In the list, select the check boxes for the components you want included in the reports.
In the Selected Components pane, if the browser screen or the pane doesn't have enough room:
- You see an overflow menu option.
- The Completeness report option becomes almost invisible in the overflow menu.
Now, when you see the overflow menu, you can also see all of the Completeness report option.
For more details, read: Check component completeness.
See more than 25 Changeset records
Previously, if you:
- Select Changesets.
- Right-click a component in a changeset that has more than 25 changes, and select Details.
- On the Changesets Details screen, select the component to display its history.
Only the latest 25 records are displayed, and there is no possibility to see all of them on this screen due to the absence of paging controls.
Now, when you view the history of a component with more than 25 changes, you can use paging controls to see all the change entries.
For more details, read:
See expand and collapse icons for a parent folder and its imported subfolders
Previously, if you:
- Select
 Components.
 - Right-click a folder that doesn't have any subfolders and select Import...
- Import a zip file that includes components and subfolders using the following options:
- Unzip
- Create Subfolders
- After you see the Import Complete notification, right-click the same folder and select
 Refresh.
 - Double-click the folder where you imported the zip file.
You can see the subfolder, however:
- There is no
 expand or
  collapse icon for the parent folder.
 - You can't see the subfolder's contents even after double-clicking the parent folder.
Now, when you import a zip file that includes components and subfolders, you can see ![]() expand and
expand and ![]() collapse icons for both the parent folder and its subfolders.
collapse icons for both the parent folder and its subfolders.
For more details, read: Manage where a component is stored.
Enhancements to project management
Use Advanced Search to find a workflow
Now, as you create and use more project workflows:
- You can use basic search tools to find a workflow.
- You can build more advanced queries to find the workflow you need.
- If you want to save your search results, you can Save as a CSV file.
Directly under the Workflow title bar is a grey ribbon that tells you what filters and queries are being used.
For more details, read: Find project workflows.
See the State for Completed and Cancelled assignments
If a non-admin user views an assignment that has been initiated by a Workflow and has a State of Cancelled or Completed, on the View Assignment screen, the assignment's State field is empty.
Previously, if:
- A non-admin user opens the
 Projects tab.
 - The user opens a project.
- The user opens the Workflow pane.
- The user sees that the workflow has a State of Completed.
- In the Assignments pane, the user selects an assignment that was completed in the workflow.
- The user right-clicks the assignment and selects View.
The user sees that the State field is empty.
Now, when a non-admin views an assignment:
- That was initiated by a Workflow
- Has a State of Cancelled or Completed
On the View Assignment screen, the assignment's State field shows the correct value.
For more details, read:View assignment status.
See an assignment's Workflow column sorted correctly
Previously, if you:
- Click Projects.
- Locate and open a project with many assignments and workflows.
- Look in the project's Assignments pane.
The Workflow Name column is sorted incorrectly.
Now, when you look in the project's Assignments pane, the Workflow Name column is sorted correctly.
For more details, read:View assignment status.
Enhancements to translation management
Know which translation jobs you are cancelling
When you cancel several translation jobs at once, you used to see the following confirmation message:
- Do you want to cancel this translation job in Project Director?
You now see an updated message:
- Do you want to cancel selected translation job(s) in Project Director?
For more details, read: Cancel a translation job in Inspire.
See the correct State for a completed translation
On the ![]() Translations Management tab, you can view basic details about a translation job such as the State.
Translations Management tab, you can view basic details about a translation job such as the State.
Previously, if you:
- Opened the
 Translations Management tab.
 - Found a translation job in the list that Project Director has sent back to Inspire as complete.
However, the State was set to InProgress (you successfully submitted the job in Inspire (previously in a State of Queued and Submitted).
Now, when you select a translation job that Project Director lists as complete, in Inspire, when you open the Translations Management tab, the State is set to Completed (the vendor returned the translated files and they've been imported back into Inspire).
For more details, read: View details for a translation job.
Enhancements to publishing
Grant permissions to your publishing profile
When you create or update a Publishing Profile, you can use the new Permissions tab to specify which users and roles can access your profile.
- Besides yourself, anyone you grant access to your Publishing Profile can view it in the list.
- If you don't add any users or roles on the Permissions tab, the publishing profile can be seen by everyone.
- Admins can use the Show All option to see all publishing profiles regardless of permissions.
For more details, read:
Browse the list of Publishing Profiles quicker
You can create publishing profiles to make it easier to publish content.
Previously, if you:
- From the top menu, select
 Publishing.
 - On the Publishing Profiles tab, scroll through the list.
You experienced:
- The list took a long time to show more profiles and scroll through.
- It took a long time to access the menu option to publish using the profile.
- It took a long time to sort the list by column.
- It took a long time to search for a specific profile.
Now, when you go to the Publishing Profiles tab, you can scroll through the list, use the options menu, search and sort quicker.
For more details, read: Things you can do on the Publishing tab.
See Publishing Profile names that include a comma displayed correctly in a CSV
Previously, if you:
- Select Publishing.
- Find a publishing profile with:
- At least two components.
- Some file names that have comma in the name.
- Select
 Save as CSV.
The publishing profile with a comma in the name is displaced to another column of CSV file, and all other columns are displaced too.
Now, when you select Save as CSV, if a file name contains a comma, it is not displaced, and all columns show the correct information.
For more details, read: Things you can do on the Publishing tab.
See the name of the component that failed to publish in the email notification
Previously, if a component failed to publish, in your email notification, the Subject line did not contained the name of the component:
- Publish "{0}" with Issues.
Now, if you publish a component and it fails, the email's notification Subject line contains the name of the component.
- Publish MyComponent with Issues.
For more details, read: Publish your content.
Receive an email notification if a component you publish fails
Previously, if you published a component and it fails due to invalid XML, the notification is not sent to the user who tried to publish the component.
Now, if a user publishes a component and it fails due to invalid XML, the email notification is sent to the user who tried to publish the component.
For more details, read: Publish your content.
Enhancements to administration
See more details about Roles when you create, update, and save as CSV
In Inspire, you use roles to manage access to content, set permissions to perform actions on the content, and grant privileges to use specific features.
- As an administrator, you can manage roles from the
 Security menu.
 - When creating or updating a role, you now see two read-only tabs on the Role Details screen: Modules and Folders.
- The Modules tab lists the modules that the role has permissions to access.
- If the Modules list is empty, any users belonging to this role keep their individual permissions.
- To add modules to this list, you must update module access permissions.
- The Folders tab lists the folders that only users with this role have permission to access.
- If the Folders list is empty, all folders in the Components browser keep their individual permissions.
- To add folders to this list, you must set folder permissions.
For more details, read:
Filter the Event Log by selecting a Level
An event log is a file that contains information about how Inspire is being used and how it's operating.
- If you have permission, you can access the event log to view events such as errors, warnings, and fatal events.
You can now sort and filter the list of events by Level.
For more details, read: View logged events.
Publish Server 2023.1.4.0
New features and fixes
Select and copy text on the Jobs screen
After authoring your content in Inspire, you can publish components in a format your customers can read.
- Publish Server lets you manage publishing jobs after you submit them in Inspire.
- Now you can select content in the list of publishing jobs and copy it the clipboard or another application.
To copy text, use your cursor to highlight the text in any of the columns, and do any of the following:
- Right-click the text and select Copy
- Use Windows shortcut keys: Ctrl+C
- Use Apple shortcut keys: Command+C
For more details, read: Things you can do in Publish Server.
See your search results quicker
On the Jobs screen you can enter a keyword in Search to find a publishing job.
Previously, when entering search criteria, you have to wait to see any search results.
Now, when entering search criteria, you see search results quicker.
For more details, read: Search for a job.