Update one publishing profile
After you create a publishing profile, you can update the settings if they change. You can change the component, export configuration, filters, and XML validation options.
 Permission restrictions
- If you aren't an administrator, in your Role permissions, you must have module access to Publishing to complete work with publishing profiles.
- If you don't see the
 Publishing icon in the top menu, contact your administrator.
 - If you do see the Publishing icon in the top menu:
- You can see the profiles that you create.
- You can only see other profiles if you are an administrator or you have permissions to the profile.
- If you don't see the
- Anyone who creates a publishing profile can now restrict access to it.
- To get permissions to a profile, you can contact the user listed in the Last published By column.
 If you want to save a copy of a profile and then change the settings in the copy, follow the steps in Save a copy of a publishing profile.

 You can update the schedule for multiple publishing profiles at once from the Selected Components pane. Follow the steps in Reschedule multiple profiles at once.
To update one publishing profile:
-
From the top menu, select Publishing.
-
To open the profile, do any of the following:
- Right-click the name of the profile, and select Update.
- In the profile's row, click
 the Options menu, and then select Update.
-
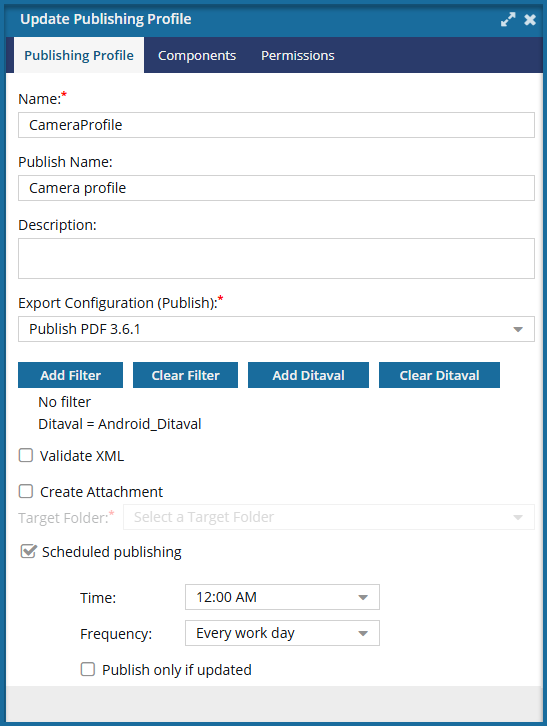
On the Publishing Profile tab, edit any of the following information:
-
Optionally, in Description, edit any instructions or guidance on when to use this profile.
If you add text here, when you publish using this profile Inspire creates a file called Description.txt. This Description.txt file is included when you download files from Publish Server. Look in the folder that contains the source files.
-
In Export Configuration, select a format for your published output.
An administrator can choose an export configuration to be shown automatically as the default. If you need to use something else you can select another option.
-
Optionally, if you've applied profiling attributes to content in the component you're publishing, you can use filters.
i. To choose the profiling attributes you want included in the publishing job, click Add Filter.
- On the Filter profiling attributes dialog, select the options you want to publish, and then click Select.
 Result: You'll see the profiling attributes you select on the Create Publishing Profile screen, listed after the Clear Filter button.
 -
Optionally, if you want to verify that your XML code in your component is valid according to your framework at the time of publishing, select the Validate XML option.
By default, this option is not selected.
-
If you want to import the published deliverable back into Inspire automatically, select Create Attachment.
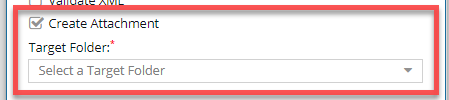
 If you use scheduled publishing, the option to Create attachment will not work. For more details, read Work with component attachments.
- In Target Folder, select the location where you want the published deliverable saved.
The file is saved as a binary. By default, it is named using the following default format: Publish-{ComponentName}-YYYY-MM-DD-HHHHMM. However, an administrator can configure Inspire to omit the timestamp from the published file name. -
Optionally, to publish on a schedule, select Scheduled publishing.

i. In Time, select when you want Inspire to submit a job to the queue to publish the component(s).
You can select a start Time between 12 AM and 11:30 PM. The options available occur every 30 minutes between this interval.ii. In Frequency, select how often you want to repeat the process of submitting a publishing job for the component(s). You can select a frequency of:
- Every work day (Monday-Friday)
- Every day (Sunday -Saturday)
- One Day of the week (Monday or Tuesday or Wednesday or Thursday or Friday or Saturday or Sunday)
- One Day of the month (1 - 31)
- Today Only (In Time, select a time that is later than the current time—a time in the future.)
- Once (Select a Date and Time for a publishing job to run only once).
If the time you select has already passed, you see an error and the publishing profile isn't saved.If the time you select is in the future, the component(s) publish at that time and then Inspire turns off the scheduled publishing job so that it will not run again.
iii. To check at the time of publishing if any of the files have changed and need to re-published, select Publish only if updated.
- If you select this option, Inspire will check to see if there is any new or updated content that needs to be published.
- If there is new or updated content, Inspire publishes all the components listed in the publishing profile (not just the components with changes).
- If there is no new or updated content, Inspire does not send any components in the profile to be published according to its scheduled time.
- Regardless of whether components are sent to be published, Inspire will check again for any new or updated content at the next scheduled publishing time.
-
Optionally, in Description, edit any instructions or guidance on when to use this profile.
-
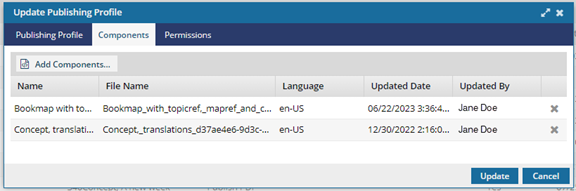
Select the Components tab and edit any of the following information:
-
To remove a component, in the list, select
 Remove.
-
In Components, select the file you want to add.
You can select more than one file to add to a publishing profile.
-
On the Select Components dialog, click Select.
 You can now see the Language used in the component.
-
To remove a component, in the list, select
-
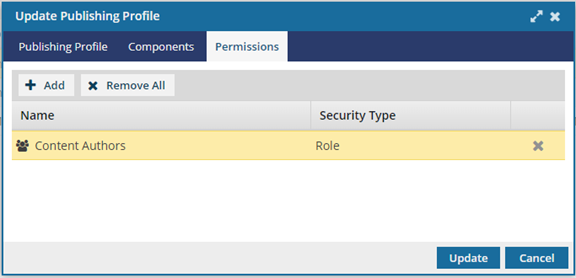
Select the Permissions tab and edit any of the following information:
-
To remove a user or role in the list, select Remove.
-
To grant more permissions, select
 Add.
Add.
-
On the Select Users/Roles screen, select the checkbox for the role or individual user you want to grant access to this publishing profile.
You can select a role or user and look in the Details pane to see all the assigned permissions.
Roles and users who have access to the profile can publish from it, update and delete the profile.
-
On the Select Users/Roles screen, click Select.
Result: On the Permissions tab, you can see who has permission to work with this profile.
-
To remove a user or role in the list, select
-
On the Update Publishing Profiles dialog, click Update.
Results:
- On the Publishing Profiles tab, you see the profile in the list with the updated settings.
- Adding a component creates a relationship. After you add a component to a publishing profile, Inspire remembers that it is being used. If a user tries to delete the component, they see the following message:
Cannot delete components because one or more are used in a publishing profile. Clear all publishing profile references to these components or remove them from your selection and try again.
Users also see this warning if they try to delete a folder that contains a component included in a publishing profile.The user sees this warning and can't delete the component(s).
If a user wants to delete the component, they can do one of the following:
- Update a publishing profile and remove this component.
- Delete a publishing profile that includes this component.