Things you can do in the Notifications module
You can use the Notifications tab to read about the status of a task you've submitted in Inspire. When you're working with components, reviews, projects, and translations, you can select options that require Inspire to perform a task, such as publish a component to a PDF.
- The Notifications module contains one tab called Notifications.
- You open it by going to the top menu and clicking
 the Notifications icon.
 - The Notifications module is listed after
 the Taxonomy module and before
  the Event log module.
 You can also see and manage notifications from
  the Notifications menu icon.
- You can find a list of all of your recent notifications and a brief summary by clicking
 the bell icon. To open the Notifications tab, in the panel's title bar, click See all notifications.
 - For more details, read Manage your notifications from the panel.

Inspire lets you know the progress of the tasks you've submitted through notifications.
- Almost all notifications are internal, meaning that you see a message on an Inspire screen and in your notifications list.
- You can configure Inspire to also send notifications to Slack and Email.
 Inspire only keeps notifications for 30 days after it's sent.
- It doesn't matter what State the notification is in (Read, Unread). All messages are deleted 30 days after they're sent unless you delete them first.
- Remember that by default, Inspire also sends notifications to the email address associated with your Inspire account. If you need to save a notification for longer than 30 days, you can manage that in your email application.
 If you aren't receiving a notification, you may not have them enabled.
When you select an option that requires Inspire to perform a task, you may get a notification about its progress. By default, Inspire is allowed to send you notifications in all three available places: Email, Slack, and in the Inspire app. However, not all options for all actions are selected to trigger a notification by default. You can use the Settings option to manage when you get a notification and where.
- Follow the instructions in Change your notification preferences.
All new users added on or after March 6, 2024, have all notifications turned on by default.
From the Notifications tab you can:
 Refresh the list of notifications. Reloads or updates the list. Do this to show the most recent notifications.
 Search for a notification. Use any of the following methods:
- Search for a notification using a number, word, or phrase. You can only search in the Subject, Summary, and State columns. You can't search the notification body.
- Find notifications for specific types of alerts, including: Info, Warning, Failure, and Finished.
- Limit the list to notifications that are in a specific state, such as Read, Unread and Archived.

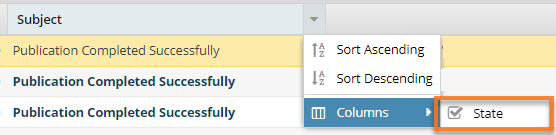
 Sort the list. Use the arrow next to the column name to sort the list ascending or descending by the column values.
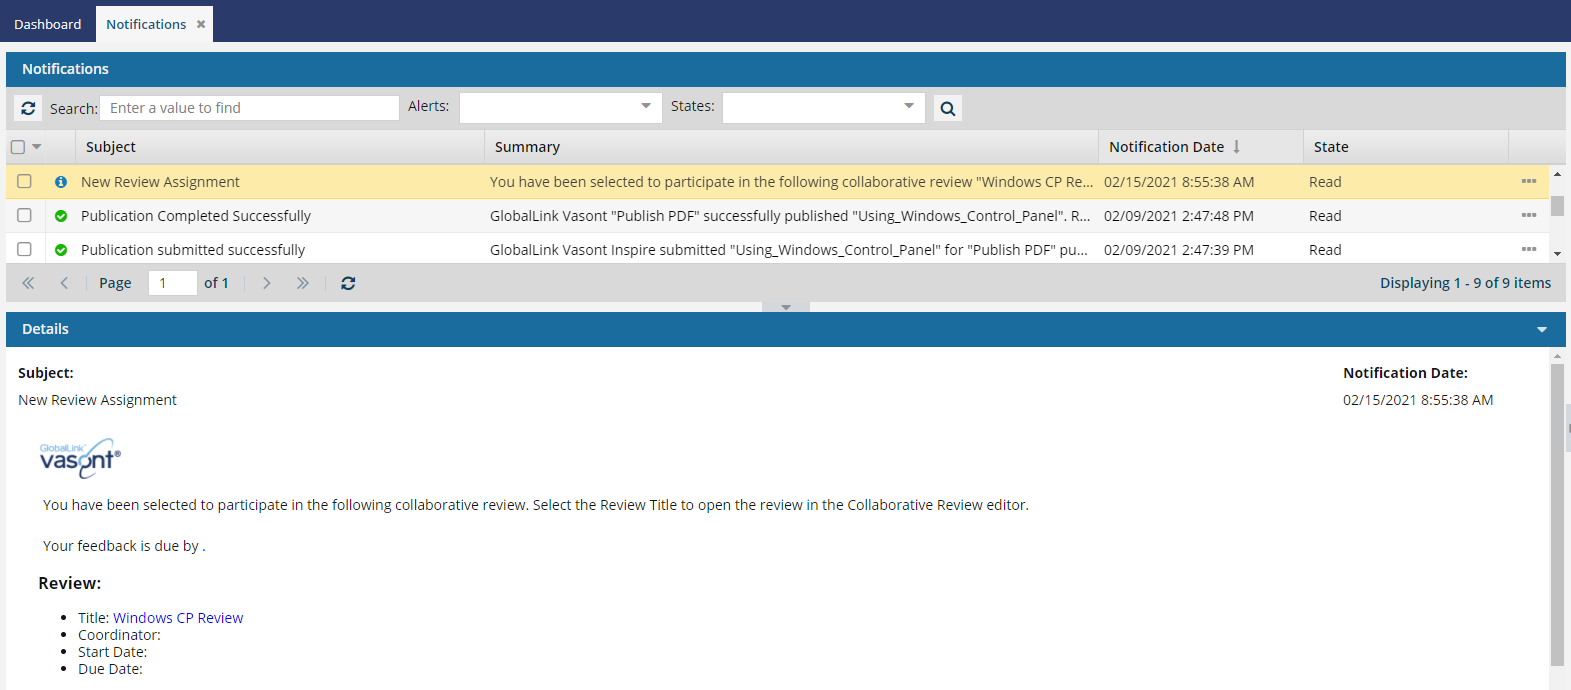
- See details about the notification. Track high-level details such as Subject, Summary, Notification Date and State.
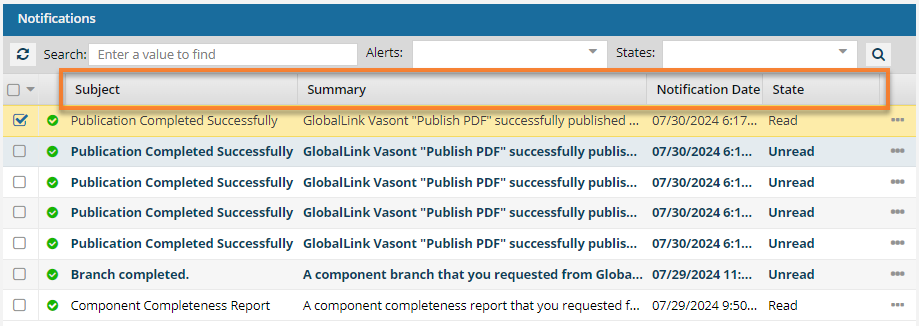
- Remove or show State details. Use the dropdown menu next to any column name to show or hide the State column.
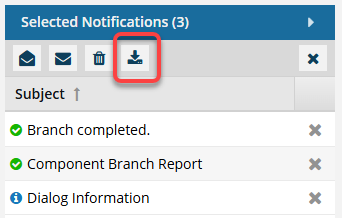
- Select multiple notifications to manage at the same time. Open the Selected Notifications panel to mark as read or unread, or delete all the listed notifications at once.
- Open
 the Options menu. This allows you to manage the notification in the following ways:
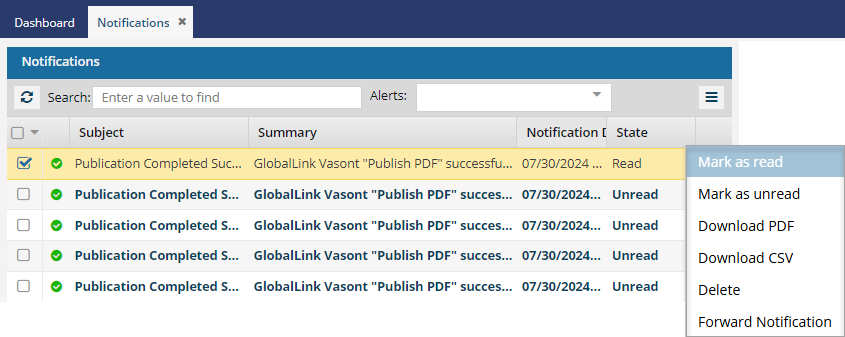
- Mark as read. Changes the selected notification listing from bold to plain text.
- The State also changes to Read.
- The number of notifications in the bell icon decreases by one.
- Mark as unread. Changes the selected notification listing from plain back to bold text.
- The State changes back to Unread.
- The number of notifications in the bell icon increases by one.
- Download PDF. Saves a copy of the notification message body as a PDF to your local computer in the Downloads folder.
- This is a useful way to preserve the information about the notification and any links it includes.
- You can select multiple notifications to download at the same time. On the Selected Notifications panel, use
 the Download option.
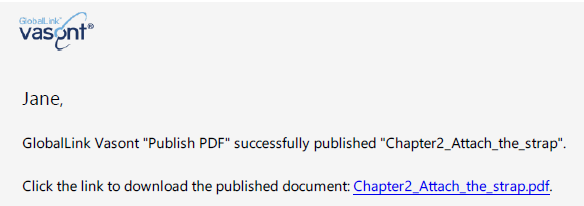
 - A sample of the message body PDF looks similar to the following:
 If you want to download the published document instead of the notification body, select the notification to open the reading pane and select the document's link. For more information, follow the steps in Download content.
- Download CSV. Saves a copy of the notification as a CSV to your local computer.
- This is a useful way to export report information that's sent in the notification so that you can search and sort the data.
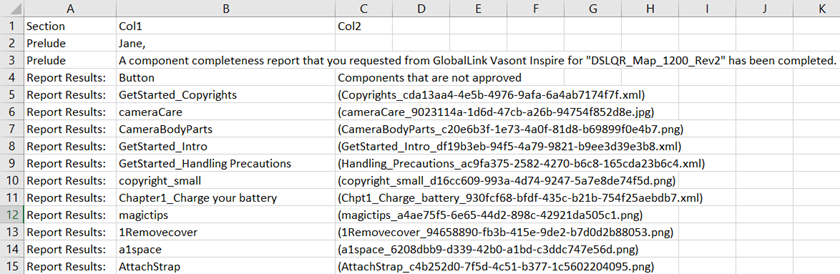
- A sample of the CSV file looks similar to the following:
- Delete. Removes the selected notification from the listing on the Notifications tab and the Notifications panel accessed from the bell icon. Use caution as this action can't be undone.
- If you delete a notification, you may be able to recover the contents if the notification was sent to Slack, email, downloaded as PDF, or forwarded to another Inspire user.
- Forward Notification. Opens the Select Users/Roles screen so that you can choose individual Inspire users or a group of users by Role to send the notification to. The user you forward the notification to sees it as if they had just completed the action themselves. The notification is seen in Inspire, plus any form of notification that the user has turned on, such as email and Slack.
- If you select a role, each user belonging to that role receives a copy of the notification.
The notification uses the same Subject line but with a prefix of "FWD:".
- When you open the forwarded notification, clicking any links won't open a new instance of Inspire if you already have it open. This prevents issues with license availability.
For example, if you used the Save as copy option on a component called "Chapter4_Set the Date and Time" and then forwarded that notification to another user:
- In the top right corner of the Inspire screen, you see a notification that the forwarding process has started.

- When the process is finished, the selected users immediately see the notification that you forwarded. The user also sees it in their Notifications module.
- If enabled, the user would also see it in email and Slack.
To ensure you receive a notification, follow the steps in Change your notification preferences.
- Mark as read. Changes the selected notification listing from bold to plain text.
- Read the detailed message. You can see details about the event that caused the notification, as well as:
- Use links to download published files
- Open reviews
- Open projects