Automate translation with GlobalLink Enterprise
You can integrate the content you develop in Inspire with GlobalLink Enterprise (formerly known as Project Director) to easily manage translations, ensuring they're always up to date.
 You must have permission to be a translation coordinator or be an administrator before you can send a component to translation or manage a translation job.

 Tips and tricks
 Project Director has been renamed to GlobalLink Enterprise.
 If you are sending a large amount of files to GlobalLink Enterprise for translation, you can use the following procedure to split up the files into multiple jobs by language:
- Set a maximum value of files per job. In Inspire, administrators can open the GlobalLink Enterprise Configuration and set a Maximum Document value.
- Send source components to GlobalLink Enterprise for translation. After determining how many topics there are for each target language, Inspire uses the Maximum Document value to calculate how many languages can fit into a submission.
- Inspire automatically creates multiple submissions. Each submission that is created includes a prefix of a dash and a number (-1, -2, -3, etc.) to help you identify that the submission was split up.
 When creating a translation request for a large number of files, you do not need to select an option or set any special value. If an administrator sets a Maximum Document value, Inspire analyzes your job automatically and splits it if necessary.
Fore more information, read Split large translation jobs sent to GlobalLink Enterprise.
- You can now see the ID that GlobalLink Enterprise creates for a translation job it receives from Inspire. The ID is stored in Inspired as a SubID. You can show or hide this column on the Translation Management tab.


 Be aware of restrictions and exclusions that can be applied to components!
- Optional feature restriction for Approval. By default, a translation coordinator can select any unlocked component and send it to translation. However, an administrator can remove the ability to send a component to translation unless it has been approved.
- If an administrator sets the optional TranslationApprovedOnly feature to true and enables it:
- In the Components browser, when using the right-click or
 Options menu, the Translate option cannot be selected if the component is not approved.
 - If the topic is approved, for example a map, but the references are not, the coordinator sees errors for those components that are not approved.
- If the topic is approved, but the references are not, the translation job can't be created until one of the following occurs:
- The TranslationApprovedOnly feature is not enabled (set to false).
- The coordinator approves all referenced components.
- On the Translate component screen, the coordinator clears the Include referenced components option.
- In the Components browser, when using the right-click or
- If an administrator sets the optional TranslationApprovedOnly feature to true and enables it:
- Components can be excluded by a tag. If a user doesn't want a file sent to translation, they can use a component tag to tell other users that translation isn't required. This tag also tells Inspire not to make language copies of it or to send it to translation.
- Inspire provides the pre-defined tag TranslateNotRequired.
- If you apply the TranslateNotRequired tag to a component:
- You see the component marked with
 a tag in the Components browser.
 - Translation coordinators can still add the tagged component to a translation job.
- Inspire makes sure that the component isn't sent with any new translation jobs.
- If you use this tag and the component is an XML file or a binary component such as an image or PDF file, copies of the files aren't created for translation.
- Any links in the component continue to use references in the original language
- You see the component marked with
![]() For a complete list of translation restrictions and issues, read the answers to frequently asked questions.
For a complete list of translation restrictions and issues, read the answers to frequently asked questions.
 Sending components to translation FAQs

 Before you begin
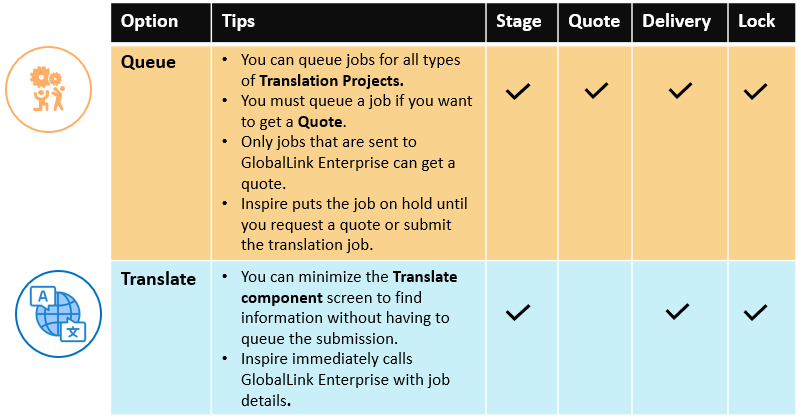
- If you are sending the translation job to GlobalLink Enterprise and want to get a quote for a cost estimate, you must queue the translation first. Follow the steps in: Create a queued translation job.
- You can keep the Translate component screen open.
When you open the Translate component screen to fill out the details for a translation request, you can now minimize this screen to go and check other Inspire screens for information.

- In the Translate component screen, you can use
 the minimize control to temporarily hide the screen.
 - You see a blue title bar with the name of the Translate component screen in the bottom right corner of the Inspire app.
- To restore the minimized screen, click
 the minimize icon again.
- In the Translate component screen, you can use


To create a translation job for a components:
- Select a components.
- Enter translation details.
- Optionally include attributes.
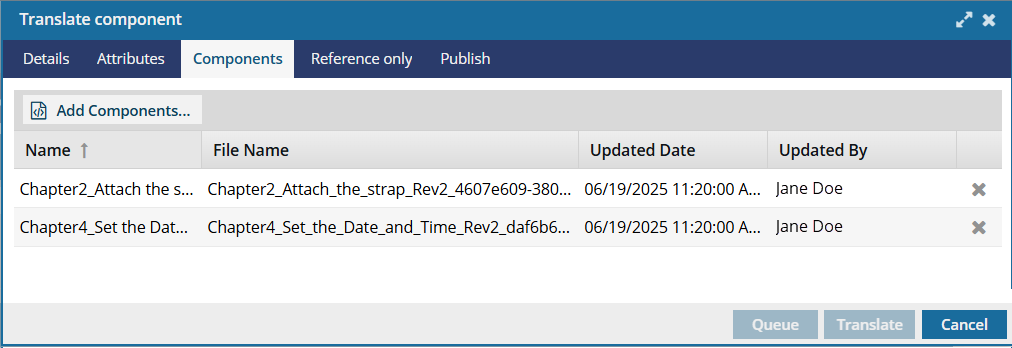
- Optionally add more components.
- Optionally include reference components for GlobalLink Enterprise.
- Optionally configure automatic publishing of translations.
- Translate or Queue the translation.
- Manage the translation job as it progresses.


To send files to GlobalLink Enterprise for translation:
1. Select components
 Important notes:
- If a locked review component is added to a translation job, the content sent is the same as what existed at the time it was added to a review.
- No review comments or changes are included in the content sent to the translator.
- Administrators can follow the steps in Allow locked review components to be translated.
Languages. You can only select components that have the same source language. This restriction allows you to submit translation jobs to external applications without encountering an error. If you have components with different source languages, you need to create a separate translation job for each source language

To select multiple components:
-
To select multiple components from the Components browser:
-
To select multiple components from a project:
2. Enter translation details
 |
|---|
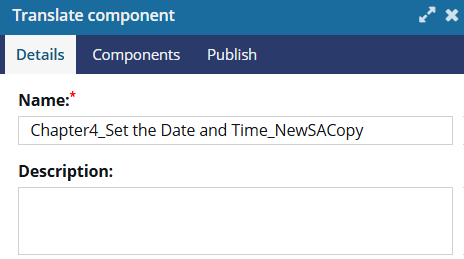
| 1. | On the Translate component screen, select the Details tab. |
| 2. | In Name, enter a unique name for the job using 100 characters or less.
|
| 3. | Optionally, in Description, add details about this component using 1000 characters or less. |
 |
|---|
| 4. | Optionally, to automatically populate options on this screen, select a Translation Configuration.
|
| 5. | To identify how the translation work will be completed, in Translation Project, choose a method that uses the PD Rest API.
|
| 5a. | If you selected a Translation Project that uses integration with GlobalLink Enterprise (PD Rest API), select the Translation Workflow to use in GlobalLink Enterprise (formerly known as Project Director).
Workflows can be customized and will vary. Some examples of a workflow might be:
|
 |
|---|
 If your administrator has enabled the feature, you may see an option called Pivot to English. If your administrator has enabled the feature, you may see an option called Pivot to English.
|
| 6. | If you see Pivot To English, do one of the following:
|
 |
|---|
If you submit a translation request for a language pair that does not exist in GlobalLink Enterprise, you see a failure notification. If the language pair cannot be found, the translation job will not be created in Inspire. |
| 7. | To select the language you want this component translated to: |
| 7a. | In Translation Target, click Select Languages. |
| 7b. | In the Select translation languages screen, select any of the following:
|
| 7c. | In the Select translation languages screen, click Select. Result:
|
 |
|---|
| 8. | In Export Configuration (Translation), select Translation unless you've created a custom export configuration you want to use instead.
|
| 9. | Optionally, to Ignore Content Attributes. select one of the following:
For example, if the only changes made to a topic are attributes used to define where page breaks are, you don't want to run this topic through translation again and incur unnecessary costs. |
 |
|---|
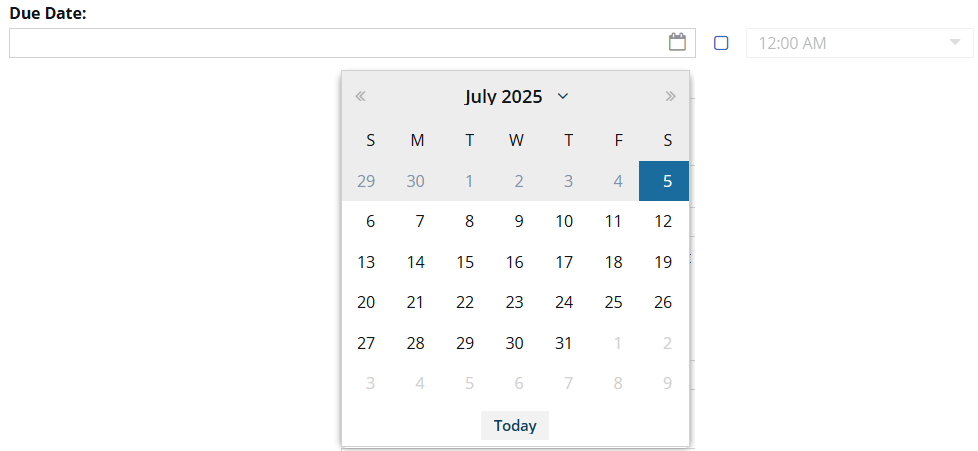
| 10. | In Due Date, do any of the following:
|
| 10a. | To add a time, next to 12:00 AM, select the checkbox and then select a time from the list. |
 |
|---|
| 11. | To include content for translation only if it has a specific profiling attribute, click Add Filter. |
| 11a. | On the Filter Profiling Attributes screen, do any of the following:
|
| 11b. | On the Filter Profiling Attributes screen, click Select. Result:
|
 |
|---|

|
| 12. | To let Inspire add components to this job automatically if any topic references them, leave Include referenced content selected.
|
| 13. | To translate content in the source components that isn't XML, such as images, select Translate Binary. |
| 14. | If your organization is using DITA specializations in Inspire, you can include a custom schema file in the translation job by selecting Include Schema.
|
| 15. | If there was an issue with a previous translation and you want Inspire to translate files again, you can select Force Translation of All Components.
|
| 16. | You can add the Inspire Translation Job Id to the Submission Name by selecting Prepend Translation Job Id to Submission Name. |
3. Optionally include attributes
If the Translation Project type you select has attributes associated with it, you'll see an Attributes tab.
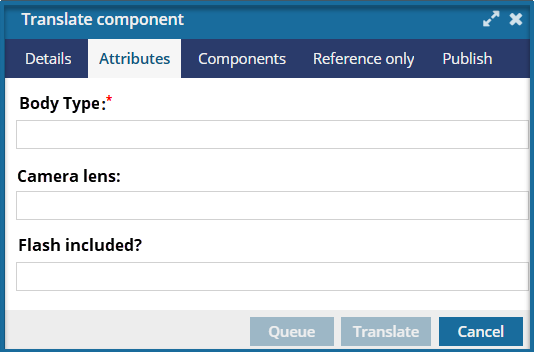
 You only see this tab if you are sending additional details about the job to a GlobalLink application that Inspire can communicate with. You must select one of the following options on the Details tab, in Translation Project.
- GlobalLink Portal (formerly Transport)
- PD Rest
 Translation attributes are created by your organization. Therefore, the attributes shown in the example screen above will be different from what you see on the Attributes tab.
4. Optionally add more components
 Tips and tricks
- You must have at least one unlocked component in the translation job.
- If a component is locked for review, you can add it to the translation job ONLY if the TranslationLockSourceDisabled option is set to True. Administrators can follow the instructions in Allow locked review components to be translated.
- If a locked review component is added to the translation job, the content sent is the same as what existed at the time it was added to a review.
- No review comments or changes are included in the content sent to the translator.
- For components that aren't binaries (images), the source languages must all be the same.
- For binary components (images), you can add images translated into other languages if your administrator allows it. Administrators can read:t Reuse translated images across language codes.
- When you Add Components, on the Select Components panel, you can set the number of components listed per page. At the bottom of the list, next to Items per page, from the dropdown menu select a quantity.
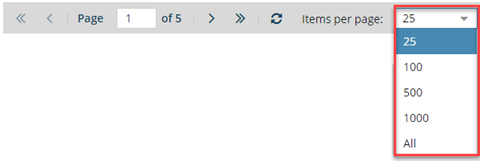
Inspire remembers how you customize this setting. The next time you open the Selected Components panel, Inspire uses your choice instead of the default. If you want Inspire to forget your customization and return to showing the default number of Items per page, you must re-select the default or clear your browser's cache.
To optionally add more components:
5. Optionally include reference components for GlobalLink Enterprise
 Tips and tricks
Reference components are not locked in Inspire.
Reference files aren't returned from GlobalLink Enterprise.
You can send the same files for translation and reference only. This is helpful when the linguist might need to refer to the original, such as a map, when making changes.
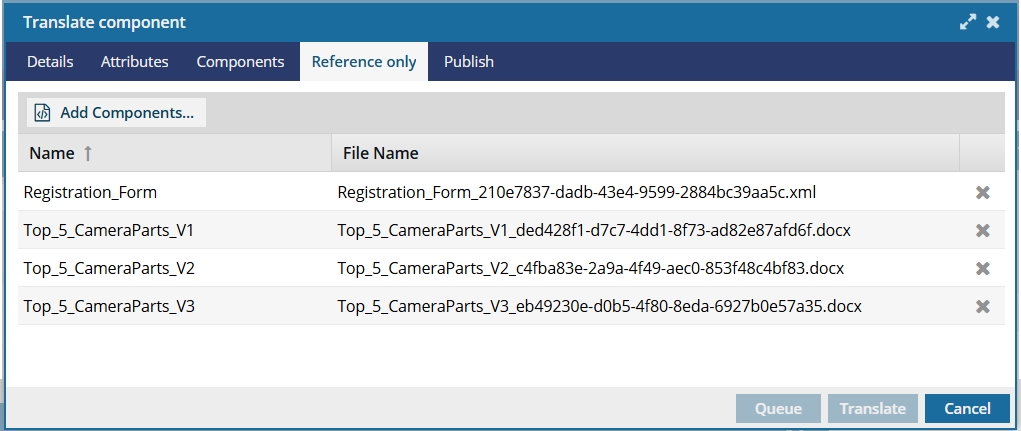
 You only see this tab if you are sending reference files to GlobalLink Enterprise (formerly known as Project Director). On the Details tab, in Translation Project, you must select PD Rest

To optionally include reference components for GlobalLink Enterprise:
6. Optionally configure automatic publishing of translations
You can have Inspire automatically publish the translated components and import the published deliverable back into Inspire. The translated content is published when the translation job is marked Completed, and Inspire publishes the content according to the publish configuration you select.

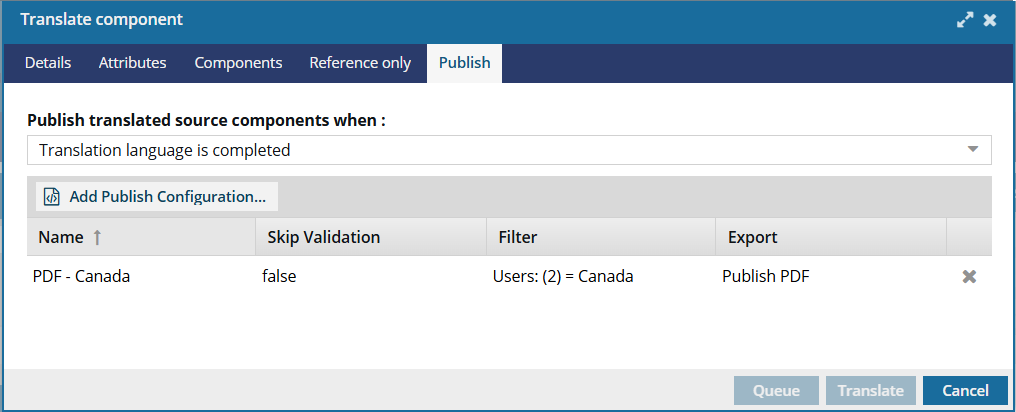

To optionally configure automatic publishing of translations:
- On the Translate component screen, select the Publish screen.
- In Publish translated source components when, select Translation language is completed.
- Click Add Publish Configuration...
-
On the Publishing Configurations screen:
- Select the type of deliverable you want to create for the completed translations.
- Click Select.
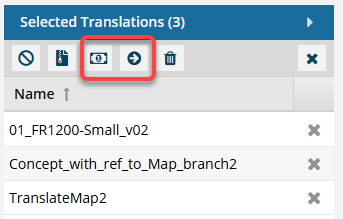
7. Translate or Queue the translation


8. Manage the translation job as it progresses
Inspire prepares the job
Inspire creates a folder for each language you select. The folder's location is based on the component you select for translation.
Inspire creates a target language component and puts it into the new language folder. A target language component is created for each language you selected.
Inspire sets the Reading property ("ltr" or "rtl") as it is specified in the language definition when creating target components for translation.
- As the translation coordinator, you'll receive an email notification that the translation job was submitted.
 Any other users added to the Project configuration on the Notifications tab will also receive notifications.
 - When you complete a task that triggers a notification, such as managing translation jobs, the Slack and email message bodies contain:
- The notification with ten or less Issues, Errors, and Warnings.
- A link at the bottom of the message [See Full Version].
- You can click the [See Full Version] link to expand a section under the link with the full details.
 When Inspire is preparing the job, you may see warning messages that a component was not included in translation job because:
- It is already active in another translation job for the same language
- Its content does not require translation
 All Translation Coordinators who receive notifications also see Job IDs in the warning messages:
- The component [COMPONENT NAME] was not included in translation job [ID, JOB NAME, TRANSLATION LANGUAGES] because it is already active in another translation job [ID] for the same language: [ID].
- The component [COMPONENT NAME] was not included in translation job [JOB NAME, TRANSLATION LANGUAGES, ID] because its content does not require translation
- Inspire won't send a component to translation if it's already been translated and there aren't any changes. The only exception occurs when you select the Force Translation of All Components option to overwrite a previous translation.
- Files may have been excluded due to a filter or an export configuration.
- Files can have a tag called TranslateNotRequired to exclude it from jobs. For more information, read Exclude a file from translation using a component tag.
 In Translation Target, to create a request that doesn't fail, you must:
- Select a target language that is different from the language used in the source components.
- Select a target language that exists in your project configuration in GlobalLink Enterprise (formerly known as Project Director).
For example, you include source components that are written in Japanese instead of English. When you request that the source content be translated into Japanese, that creates a language pair of Japanese to Japanese. However, in GlobalLink Enterprise you have a source-target language pair defined as English to Japanese.
- If you submit a translation request for a language pair that does not exist in GlobalLink Enterprise, you see a failure notification.
- If the language pair cannot be found, the translation job will not be created.


Inspire processes the job
- If you selected Translate:
- If you're using an integrated vendor, Inspire contacts them and delivers the files and job settings. The integrated vendor provides Inspire with an ID that allows Inspire to track the job's progress.
- If you're using a manual process, you receive a notification with a link. The translation job content can be downloaded from that link. Then you must send the target files to the vendor for translation and provide them with the job details.
- In the Translations module, on the Translation Management screen, the State is set to In Progress.
- If you selected Queue:
- Inspire does no further processing of the job.
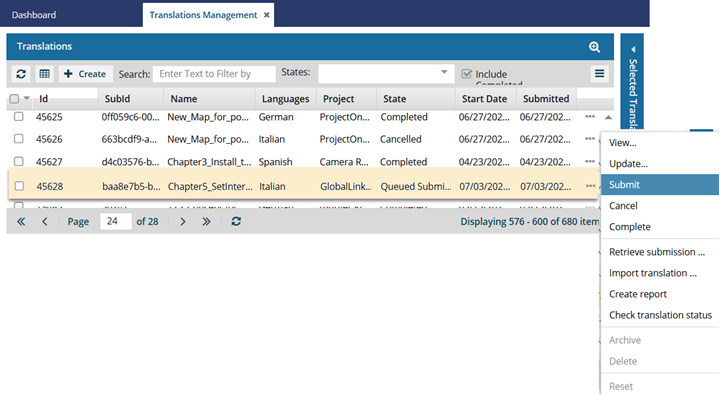
- In the Translations module, on the Translation Management screen, the State is set to Queued Submission.
- To start the translation work with the vendor and finish processing the job, you must do one of the following:
- Send for a quote. After a quote is approved, Inspire automatically starts the translation work.
 Work with quotes
 The Inspire user does not have to approve all quotes before translation work begins in GlobalLink Enterprise. However, this behavior may vary depending on how you have configured your Project in GlobalLink Enterprise.
 If you are using multiple vendors, a vendor can only begin work if you approve the quote. Not approving a quote for a vendor may result in a translation job being only partially completed. You may have to Force complete the job and resubmit a new translation job for the language or vendors who quote you did not approve.
 - Submit the job. Select this job and choose to Submit it before Inspire can start communicating with integrated vendors.
- Send for a quote. After a quote is approved, Inspire automatically starts the translation work.
- After you Submit the job, Inspire completes the processing as outlined in the previous item: If you selected Translate.


 Completed jobs
- Translation coordinators receive an email notification that the translation was completed. This includes any users added to the Project configuration on the Notifications tab will also receive notifications.
The email notification contains the following information:
- The status. If the job was successfully Completed or Cancelled in GlobalLink Vasont Inspire. For example:
- A translation job that you requested from GlobalLink Vasont Inspire for [17563] "DSLQR_Map" (fi-FI) has been successfully created.
- The translation job [17563] "DSLQR_Map" (fi-FI) was cancelled in GlobalLink Vasont Inspire by "janedoe@mycompany.com".
- The translation job [17563] "DSLQR_Map" (fi-FI) was successfully completed.
- The translation job ID. (For GlobalLink Enterprise and TransPerfect jobs.)
- The translation job Name.
- A list of target Languages used in the translation job.
- User Name of the account that completed or cancelled the translation job.
- The status. If the job was successfully Completed or Cancelled in GlobalLink Vasont Inspire. For example:
- If you selected the Pivot to English option, in Translate to English first, refer to the Results section.
- In the email notification, you can use the link to zip file to download deliverables.
- When translation creates a zip, you see the file name as Translate-{Job Name}-{date/time}.zip.


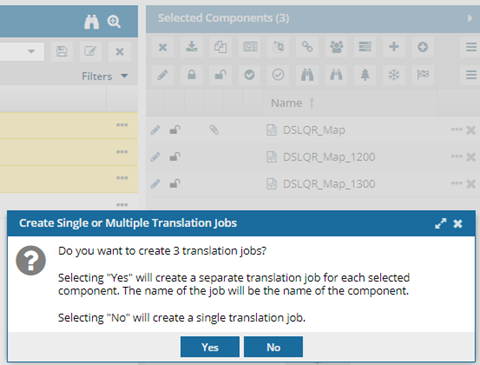

 , and then select the checkbox next to each component you want to translate.
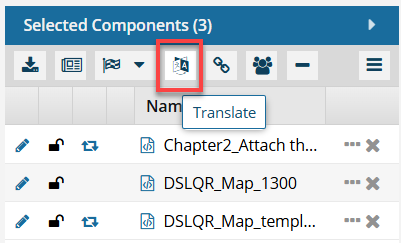

 next to the group names in bold. To see the languages in a group, click the Expand sideways arrow
  next to the group name in bold. Select a group to automatically include all the languages in the group.
 and then re-expand
 the calendar icon to open a date picker. The current date is highlighted in blue. To select a day, click the number.
 , you haven't added all the required information. Go back to each tab and look for fields with a red star. Ensure you've completed each required setting.