Branch components
If you want to make a copy of a component and maintain a relationship between the original component and the new copy, you can use the Save as a branch option. This is helpful if there are different versions of a component that you want to track and update separately but still want to have a common starting point for the information.
Read the following sections to learn more about working with branches:
- Creating a branch
- Choosing references to branch
- Finding your branches in the Components browser
- Using the Branch Management tool

![]() Still have questions? Read Branching FAQs.
Still have questions? Read Branching FAQs.
Creating a branch
In Inspire, which is a Content Management System (CMS) that provides you with version control, you would want to branch a file for several key reasons:
- Parallel development and collaboration: Branching allows multiple individuals or teams to work on separate features, fix errors, or create experimental content without affecting the live production site or each other's work.
- Reduce conflicts: By creating a separate workspace for each set of changes, you can significantly minimize the risk of content authors overwriting each other's work or introducing conflicts.
- Streamline workflows: Teams can collaborate more efficiently, reviewing and testing changes within branches before merging them back into the main content repository.
- Maintain stability and quality: Branching ensures that the main content remains stable while new development takes place in isolated branches.
- Control experimentation: Branches provide a safe environment to experiment with new ideas, designs, or functionalities without the risk of breaking the main website or affecting users.
- Fix errors and perform rollbacks easier: If an error or issue is introduced, it's easier to pinpoint the source of the problem and revert to a previous, stable version of the branch. This approach helps minimize downtime and impact on the live content.
- Efficient Reviews: You can perform reviews on specific branches, allowing collaborators and stakeholders to focus on the changes related to a particular feature or task before merging it into the main repository.
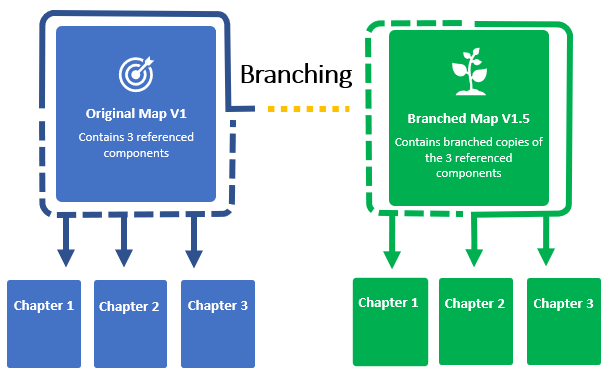
The figure above illustrates how links to referenced content are changed when a new branched component is created. Any reference content can also be created as a branched copy.
 Tips and tricks
- You can create a component branch from an existing component and add the branch to a specific component folder.
- You can choose if the branch maintains all, some, or no content referenced in the source component.
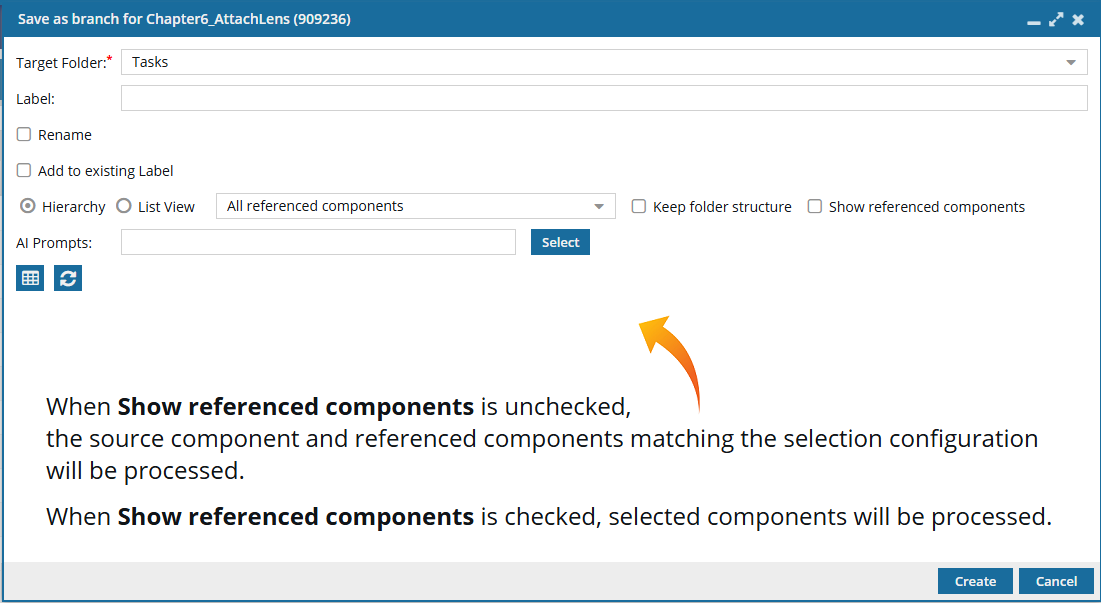
- If a source component has a long list of references, you can bypass the wait time for the display to load and quickly create a branch. Just make sure NOT to select Show referenced components. This creates a branch with all references.
- You can also accept the wait time and display the list of references and customize which specific components are branched.
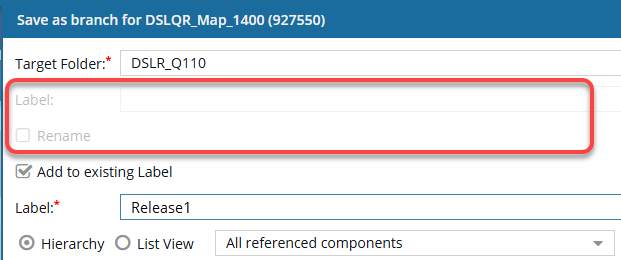
- If you select Add to existing Label, the Rename checkbox and the Label entry field options are no longer available. Instead, you must select the Label of an existing branch.
In this case, the components created with the Save As Branch option:
- Automatically have the selected label attached to the Name and File Name (before the GUID - Graphical User Interface ID)
- Are added to the branch whose existing Label you selected
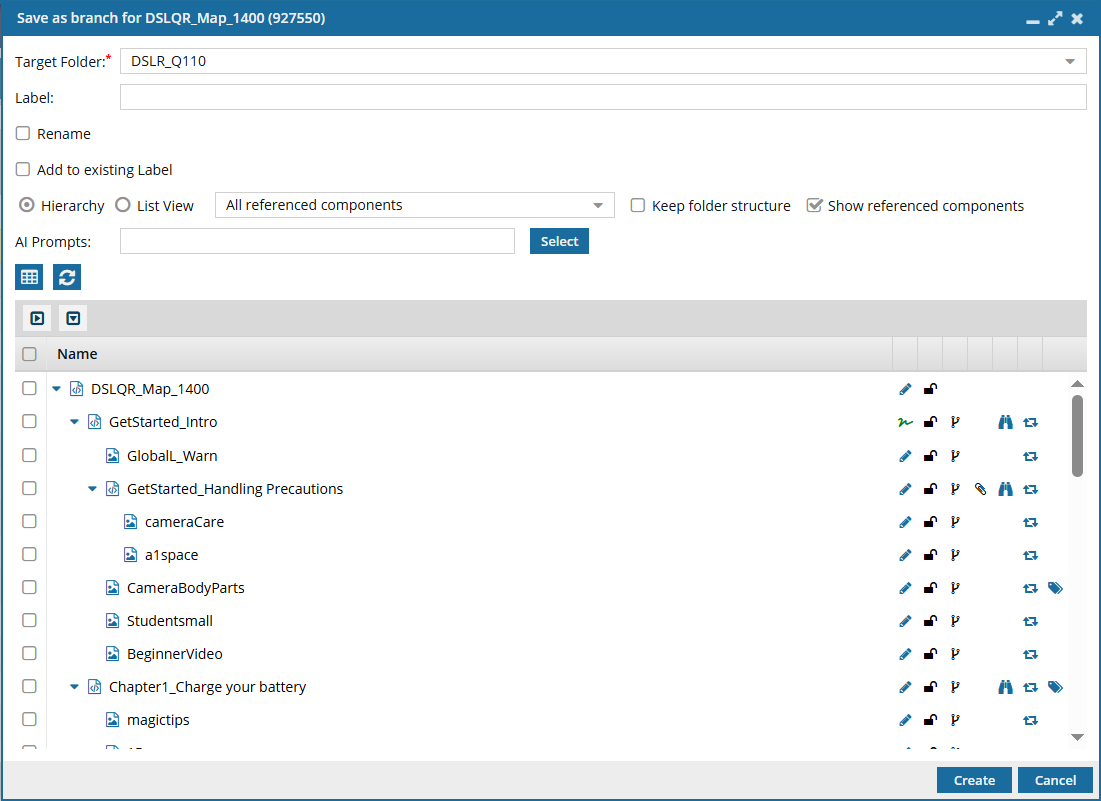
For example, for the selected topic DSLQR_Map_1400, you select Add to existing Label, and in Label choose Release1. After the branch is created:
- The map selected to Save as Branch has the existing label Release1 attached at the end of the original name and before any GUIDs.
- If any files referenced by the map are also branched, they have the existing Label Release1 attached after the original name and before any GUIDs.
- The map and referenced files are added to the Release1 branch.
- Name: DSLQR_Map_1400_Release1
- File Name: DSLQR_Map_1400_Release1_{GUID}
 If you want to use the Rename option, do any of the following:
- Clear the Add to existing Label option and create a new branch that can be given a name different from the component.
- After you complete the branch, open the Components browser, find the source of the branch you want to edit, and rename it.
 Rename a component
 You can also use the Branch Management tool to find the branch you want to rename, and then use the Go to option to find it in the Components browser. Go to a branched component
Choosing references to branch
When you select the Save as a branch... option, you can choose to either save all references or select only the ones you want to include in the new branch.
- To keep all the same references in the branch copy that exist in the source, click Create.
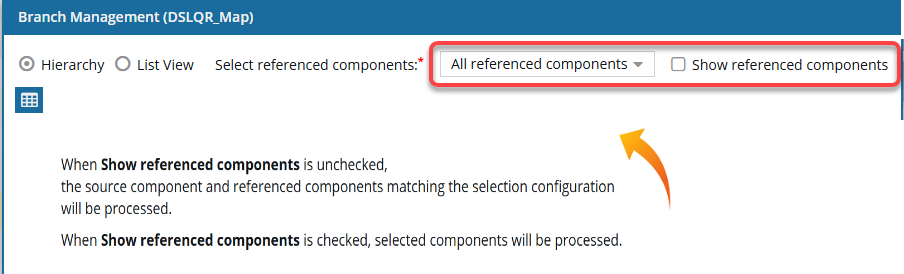
- To see the references or select a customized list of references in the List or Hierarchy view, select Show referenced components. When you select Show referenced components, a request is sent to Inspire to display the list.
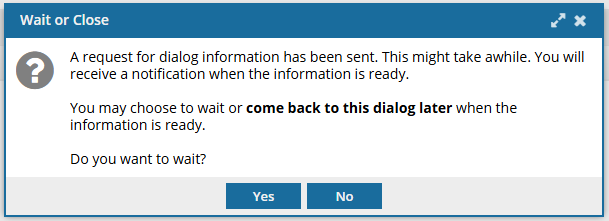
- If this is the first time you are selecting Show referenced components for this component, then you are prompted to make a selection:
- Wait for the list to be built
- Be notified when the list has been built
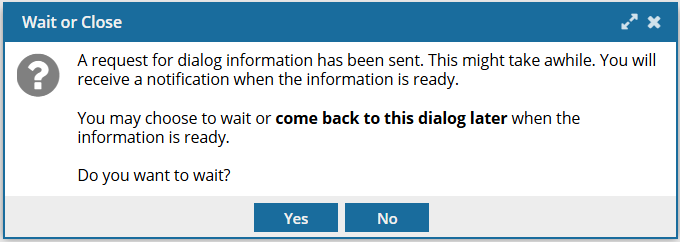
- If you choose to wait, the Save as branch screen stays open while the references are being collected. Look for a notification in the top right corner of your Inspire screen telling you that the list of references for the component has been built. Then you can continue to select the references you want to keep.
- If you choose not to wait, the Save as branch screen closes. Look for a notification in the top right corner of your Inspire screen telling you that the list of references for the component has been built. Then you can either:
- Open the notification in the Notifications module to go to the component that you were working with.
- Select the component again and select Save as branch...

- After the list of references has been built for a component, it is saved in Inspire.
- When you choose Save as branch and select Show referenced components for a component that has a saved list of references, the list appears right away.
- You won't see the prompt again unless you select a component that doesn't have a saved list or if you update the component after the list is saved.
- If this is the first time you are selecting Show referenced components for this component, then you are prompted to make a selection:
You may not see all referenced components on the Save as a branch screen.
- Components that are referenced in the source component are only listed if:
- You select the Show referenced components option
- In the Branch referenced components dropdown menu you select anything other than No referenced components
- It doesn't have a tag applied to it called ExcludeFromBranch. For more details, read Prevent branching.
Finding your branch in the components browser
In the Components browser, the branched components have an icon corresponding to their place in the branch.
- Black
 is the source component for a branch. When you hover your cursor over the black branch icon, you see a tooltip telling you it has a branch and also how many branches have been created from it. For example, Has 2 branches.
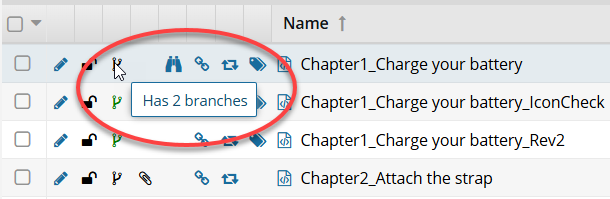
- Green
 was branched because a source component referenced it. When you hover your cursor over the green branch icon, you see a tooltip telling you it is part of a branch. For example, Is a branch.
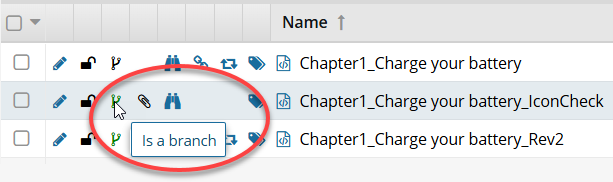
- Orange
 is both the source of one branch and included in another branch because a different source component referenced it When you hover your cursor over the orange branch icon, you see a tooltip telling you it is part of a branch and also how many branches have been created from it. For example, Is a branch and has 1 branch.
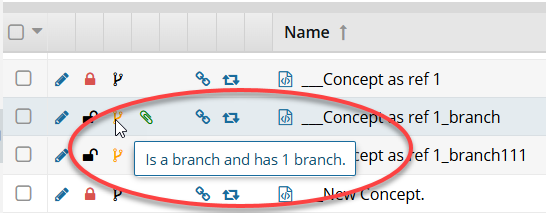
Using the Branch Management tool
After you create a branch, you can view the list of references and relationships that are created for the branched component. This helps you understand which component is the original, which is the branched copy, and if the source of another branch references this component.
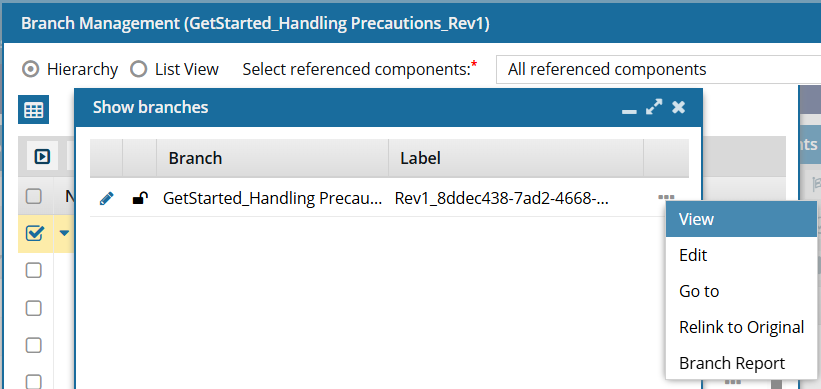
Using the Branch Management tool, you can manage all aspects of a branch, including:
- View: See all related branches
- Edit: Update the branched component
- Go to: See where the branched file is saved
- Relink to Original: Unlink a branched component
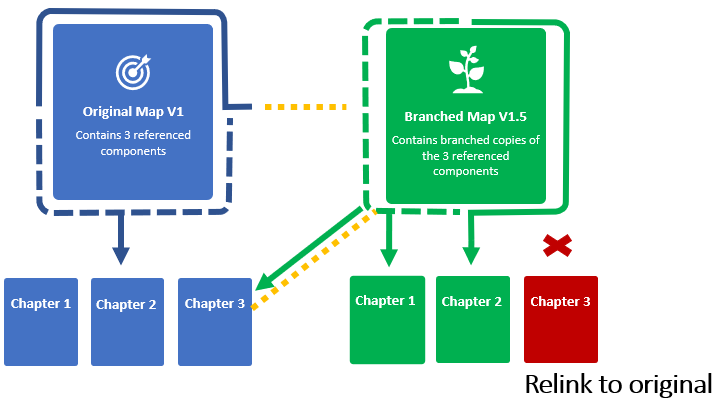
- The existing relationship between the source branched component (Map V1.5) and its reference to the branched component you are unlinking (the red Chapter 3) is deleted.
- Inspire creates a new component relationship between the source branched component (Map V1.5) and the original component reference (the blue Chapter 3). (In the diagram, this is shown by the green arrow with the yellow dots.)
- The branched source component (Map V1.5) now references the original component (the blue Chapter 3).
- The unlinked branched component (the red Chapter 3) remains and is no longer referenced by any other source component.
- Branch Report: Create reports on component branches