Send a map to review
You can review a DITA map to get feedback on the topics that are included and the topic sequence.
 Tips and tricks
- Maps can be reviewed like any other DITA component.
- The map opens in the Oxygen editor.
- Reviewers can comment or edit it.
- The map component is locked while in review.
- You can send a map to review in the following modules:
Project
Reviews Management
 You don't have to add all topics referenced in the map. If a reviewer needs to add a reference that isn't included in the review, they can add it on-demand as they are reviewing the map. For more details, read Add map topics to a review.

Send a map to review from the Components browser
-
Click
 Components.
-
On the Components tab:
- To send one map to review, right-click it and then select Review...
 You can also access this option by selecting the component, clicking
  the Options menu and then selecting Review...
 - To send multiple map components to review, select the checkbox for each map, and then in the Selected Components pane, click
 Review.
 Tips for adding components
Maps. You can send a DITA map to review to get feedback on the topics that are included and the topic sequence.
- Maps can be reviewed like any other DITA component.
- The map opens in the Oxygen editor.
- Reviewers can comment or edit it.
For specific details on map reviews, read Send a map to review.
Binary components. You can add binary components (images, PDFs, WORD docs) to a review.Binary components open in a viewer regardless if the state is In Review or Context Only.
After a binary component is added to a review and coordinator creates the review, all components in the review are locked in the Components browser, including binary components.
When a component opens in a read-only viewer, you can use the review's Discussion pane to add comments.
Attachments: If you add unlocked components to a review, and the components have one or more attachments:If the attachment is a binary component, it is added as Context Only.
If the attachment is not a binary, and it is unlocked, it is added as In Review.
After you select a component on the Select Components screen, you can see if it's locked by you or the system.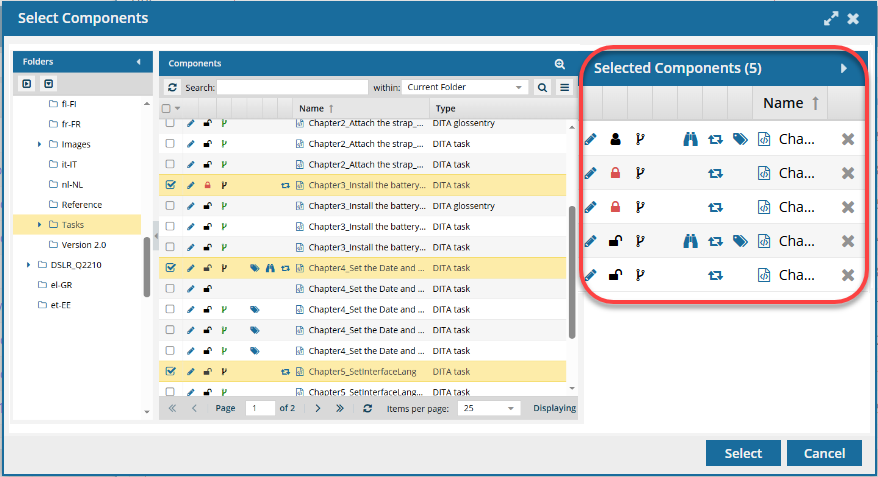
 If you are working with a review that's associated with a project, when you add components you see the Select Project Components screen.
 - To send one map to review, right-click it and then select Review...
-
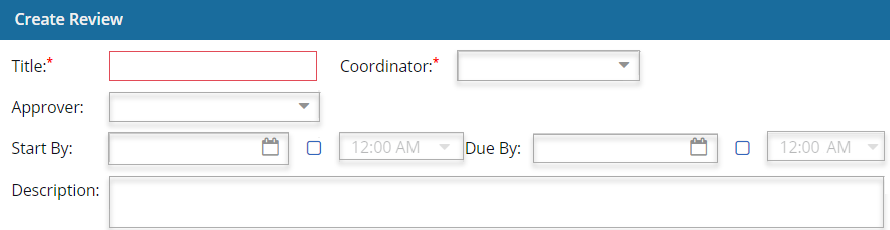
On the Create Review screen, in the details section:
-
By default, you are assigned to be the review Approver. If you want to change this, select a user from the Approver list.
Important notes
- This field is required. You can change the default assignment, but you cannot leave it blank.
- This field only lists active Admin users and users with Content browser module permission property can_approve. Follow the steps in: Control who can approve components.
-
Optionally, to choose a date when this review begins, select
 the Start By calendar.
-
Optionally, enter any additional information in the Description text box, using 3000 characters or fewer.
Previously, you could only see the Description on the Reviews Management screen. Now, you can also see the Description in the following places:
- Dashboard screen. Look in the My Reviews section. The text will truncate with an ellipse if it doesn't fit, but you can hover over Description to see the complete text.
- While working on the review. In the review editor, check the Review Details section during the review for a reminder of the instructions. The text will truncate if it doesn't fit, but you can click More... in the Description to see the complete text.
-
By default, you are assigned to be the review Approver. If you want to change this, select a user from the Approver list.
-
On the Create Review screen, in the options section:

 Previously, this screen contained an option to restrict discussions during the Resolving phase. Now all reviews work as if this option were selected. No new discussions can be saved by any type of user when the review is in the State of Resolving.
- The Create button is active in both the Component Discussions and the Discussions panes.
- You can enter text on the Create Discussion screen, but after you select Create, you see a warning that "Discussions can only be created during the review phase."
- Only the review coordinator or administrator can edit or delete messages in the Component Discussions and Discussions (for the entire review) panes when the review is in the Resolving state.
- If the review is not in a State of Resolving, reviewers can add, edit, and delete their own comments in the Collaboration panel until all users have completed their review or the review is canceled.
-
Optionally, you can specify what content should be shown to the reviewer by applying a filter of profiling attributes.
- Select Add Filter, and select the profiling attribute or category that you want to use to show content marked with that attribute.
- Optionally, to remove a filter, select Clear Filter, and clear the checkbox for the profiling attribute or category that you don't want to use.
Keep in mind:- Filters must already be applied in the content you're sending to review. If they aren't, then the content that the reviewer sees won't be changed in any way.
- When a reviewer opens the review component with a filter applied, Oxygen shows or hides text according to the filter(s) selected.
- If any content has no profiling attributes applied, it is always shown no matter what filter you add when creating a review.
-
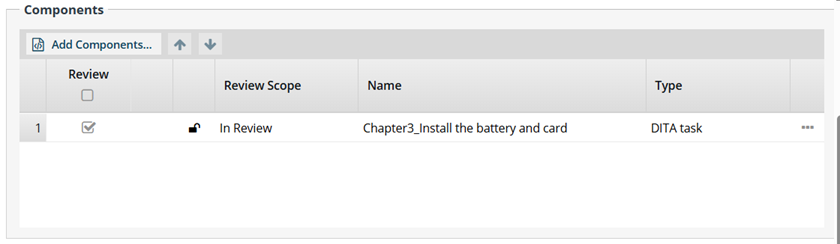
On the Create Review screen, in the Components section:
-
The component(s) you selected in the Components browser are listed in the Components section. Optionally, you can choose to do any of the following:
- Add more components.
 Using the Add Components button opens the Select Components screen. After you select a component, you can check the Selected Components panel to see whether it's locked by you or the system. If you are working with a review that's associated with a project, when you add components, you see the Select Project Components screen.
 - To re-order the topics, select one, drag it to a new place in the list, and then drop it. You can also reorder the list by selecting a component and using the
 Up and
  Down arrows to move it.
 - Clear the Review checkbox to specify that a topic is Context Only (for reference, maps, images, and locked components).
- Remove a component from the review using the Options menu.
- Open the component to make sure it's the one you want. Select the Options menu and then Go To. This option opens the Components browser (if not already opened) and selects the component.
If you add unlocked components to a review, and the components have one or more attachments:If the attachment is a binary component, it is added as one of the following:
If the binary is unlocked, it is added as In Review
If the binary is locked, it is added as Context Only
If the attachment is not a binary, and it is unlocked, it is added as In Review.
- Add more components.
-
The component(s) you selected in the Components browser are listed in the Components section. Optionally, you can choose to do any of the following:
-
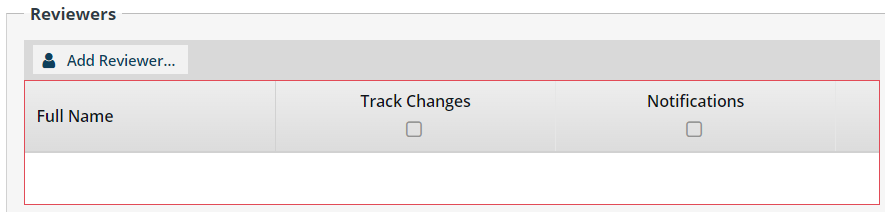
On the Create Review screen, in the Reviewers section:
-
Click Add Reviewer.
 Result: You see the Select Users/Roles screen.
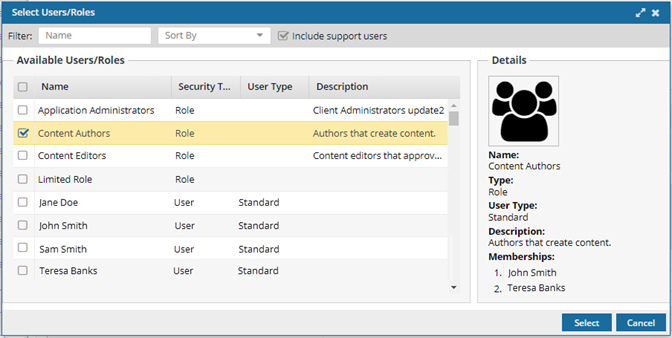
-
On the Select Users/Roles screen:
Tips and tricks: If the list is large, or you only want to see a certain type of role or user, you can narrow the list in the following ways:

- To see only names that contain a word or specific letters, in Filter, enter text. For example, you can find names that contain "admin", or "review". You can't search for text in any other column except Name.
- To see all users and roles but sorted by Name, Security Type, or User Type, click the column heading and then click the gray arrow.
- To see all roles listed first, sort the list by Security Type in ascending order. Click the Security Type column heading, click the gray arrow, and then select
 Sort Ascending.
 - To see all users listed first, sort the list by Security Type in descending order. Click the Security Type column heading, click the gray arrow, and then select
 Sort Descending.
 - To sort by Name or User Type, you can also use the Sort By dropdown box.
- By default, names with a User Type of Support are not included in the list. To see these users, select the Include support users option.
i. To add an individual User, in the Available Users/Roles list, select the checkbox next to their name.
ii. To add all members of a Role at once without having to select all the individual user checkboxes, select a Role.
Tips:- To see the list of users you will be adding, go to the Details pane and look in Memberships.
- If necessary, you can remove individual users after you click Select.
iii. When you are done choosing users and roles, click Select.
Results:- You are returned to the Create Review screen.
- The selected users appear in the Reviewers list.
- If you selected a Role, the members are listed individually in the Reviewers list.
- To remove a user, in the user's row, select the Options menu, and then select Remove.
-
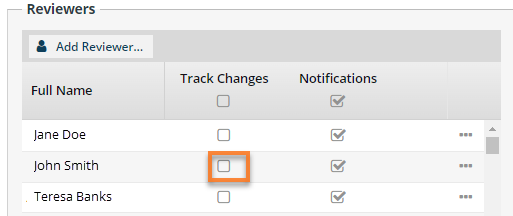
By default, all reviewers have Comment Only permission. To change reviewer permissions to Comment and Track Changes, do one of the following:
An administrator can remove the ability for all reviewers to edit content and track changes.
- If an administrator sets the ReviewCommentOnly feature to false, you can select or clear the Track Changes option.
- If an administrator sets the ReviewCommentOnly feature to true, you can only create a review with comments in the Create Review and Update Review screens. The Track Changes option does not appear.
By default, this feature is set to false. Coordinators can select or clear the Track Changes option. Administrators can read about how to manage this feature in Limit reviews to comments only.
- To grant editing permissions to a user, in the Reviewers list, go to the user's row and select Track Changes.
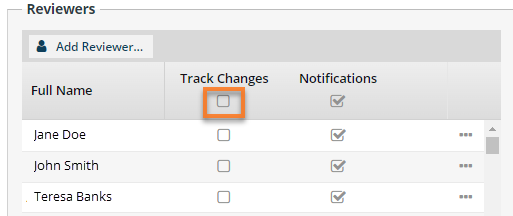
- To grant editing permissions to all users in the Reviewers list, go to the row that shows the list's heading. Select Track Changes.
-
Click Add Reviewer.
-
To create and start the review, click Create.
Results: Inspire notifies each reviewer that they can participate in this review. If a reviewer clicks the review link in the notification, they can access:
- The content in the review editor.
- The Collaboration panel, which includes a Discussions pane for adding comments.
 When you complete a task that triggers a notification, such as creating a review, the Slack and email message bodies contain:
- The notification with ten or fewer Issues, Errors, and Warnings.
- A link at the bottom of the message [See Full Version].
- You can click the [See Full Version] link to expand a section under the link with the full details.
While a review is in progress, you can:- Add and remove components
- Add and remove reviewers Be aware of the following restrictions for removal:
- If a reviewer has completed their review, you cannot remove them. The
 Remove action is greyed-out and not available.
 - If you remove a reviewer before they complete their review, their review assignment is cancelled and the Remove action is greyed-out and not available again.
- If a reviewer has completed their review, you cannot remove them. The
- Reset a reviewer's state back to Reviewing if they have already marked their review as Complete but need to make more changes.