Manage template workgroups
Inspire provides you with workgroups that you can use to collect participants that are needed to complete task activities.
 You must have permission to work with workflow templates.
- By default, only users with the following permissions can create project workflows and assignments:
- Administrator permissions
- Access to the Project Module with the Create permission
- Even if you don't have these permissions, you can be granted a special permission to create workflows and project assignments after a project is created.
- If you are an administrator, refer to Allow users to create project assignments and workflows.

 You can use these default workgroups to collect specific users who share a common skill or job title.
- Writer
- Reviewer
- Content Owner
- Publisher
You can also create your own custom workgroups.
Then, for each activity in the workflow template, you can identify who completes the work by assigning a workgroup.
 After you assign users to workgroups, their names are pre-populated in workflow templates and when a workflow is started.
You can assign a role to a workgroup, just like assigning users.
- This lets you add many users at once to a workgroup.
After you assign roles to workgroups, you can select from any user name in the role when you:
Create workflow templates
Update workflow templates
Start a workflow
If a user is in a role but not a participant in the project where a workflow is being created, then Inspire adds that user to the project.
What do you want to do?
- Create a new workgroup
- Edit an existing workgroup
- Delete an existing workgroup
- Update an activity's workgroup
Create a new workgroup
You can create a new workgroup that can then be added to any Activity in the workflow template.

To create a new workgroup:
-
Click
 Components.
-
In the workflow editor, click
 Workgroups.
-
Select
 Add Participant.
- On the Select Users/Roles screen, select one or more user who has been included in the project.
- Click Select.
-
To save your changes, click Create.
 Results:
- You can see your new workgroup when you create or edit an Activity.
You can now:- To assign your new workgroup and activity, Manage workflow template activities.
- If you are done updating the workflow, to close the workflow editor, click
 Save and Submit.
 - If you want to keep working but save your changes locally, click
 Save Progress.
 - If you want to make other changes to a review workflow, continue to Update the review workflow template.
- If you want to make other changes to a topic workflow, continue to Update the topic workflow template.
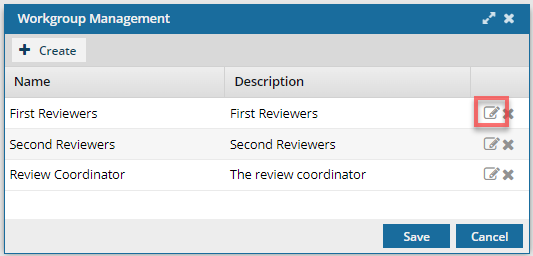
Edit an existing workgroup
You can update details and participants for a workgroup that can be used in any activity in the workflow template. If you want to edit a specific activity's workgroup, follow the steps in Update an activity's workgroup.
To edit an existing workgroup:
-
Click Components.
-
In the workflow editor, click Workgroups.
-
Click
 Edit.
Edit.
-
To add a user, select Add Participant.
- On the Select Users/Roles screen, select one or more user who has been included in the project.
- Click Select.
-
To remove a user, select the name in the list and then click
 Delete.
-
To save your changes, click Update.
Results:
- Your workgroup are saved.
- Any Activity using this workgroup also has the changes.
You can now:- To assign your updated workgroup to an activity, Manage workflow template activities.
- If you are done updating the workflow, to close the workflow editor, click Save and Submit.
- If you want to keep working but save your changes locally, click Save Progress.
- If you want to make other changes to a review workflow, continue to Update the review workflow template.
- If you want to make other changes to a topic workflow, continue to Update the topic workflow template.
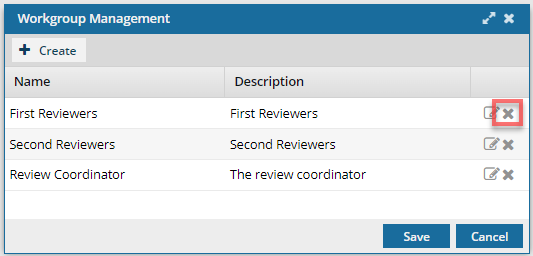
Delete an existing workgroup
If you no longer want to be able to select a workgroup when configuring activities, you can delete it.
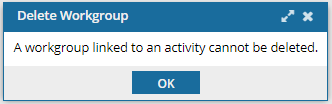
![]() To avoid breaking any activity in the workflow template that uses that workgroup, you must remove it from the activity first. If you try to delete a workgroup and it's being used, you see a message that workgroups linked to an activity can't be deleted.
To avoid breaking any activity in the workflow template that uses that workgroup, you must remove it from the activity first. If you try to delete a workgroup and it's being used, you see a message that workgroups linked to an activity can't be deleted.
To delete a specific activity's workgroup, follow the steps in Update an activity's workgroup.
To delete an existing workgroup:
-
Click Components.
-
In the workflow editor, click Workgroups.
-
Click Delete.
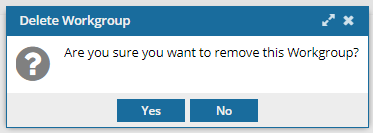
-
On the confirmation screen, click Yes.
-
To save your changes, on the Workgroup Management screen, click Update.
Results:
- Your workgroup is deleted.
- When you open Workgroups, you will not see this workgroup listed.
- When you create or update an Activity, you will not be able to select this workgroup.
You can now:- If you are done updating the workflow, to close the workflow editor, click Save and Submit.
- If you want to keep working but save your changes locally, click Save Progress.
- If you want to make other changes to a review workflow, continue to Update the review workflow template.
- If you want to make other changes to a topic workflow, continue to Update the topic workflow template.
Update an activity's workgroup
Each activity in the workflow template has an associated workgroup that identifies who completes the work. You can change workgroup assignments by editing the specific activity. If you want to update the workgroup itself, follow the steps in Edit an existing workgroup.
To update an activity's workgroup:
-
Click Components.
-
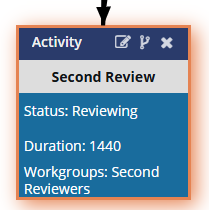
In the workflow editor, select a box in the workflow that is titled Activity.
Result: The box you select has an orange highlight around it.
-
In the Activity title bar, click
 Edit.
Edit.
-
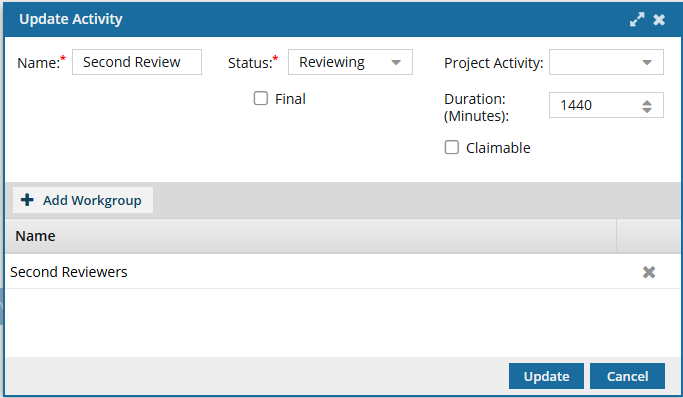
To add a Workgroup, select Add Workgroup.
- Select an option such as First Reviewer, Second Reviewer, or Review Coordinator.
- Click Update.
-
To delete a workgroup, click Delete.
 You must have at least one Workgroup assigned to the Activity.
 -
To save your changes, click Update.
Result: You can see your updated activity in the workflow editor.You can now:
- If you are done updating the workflow, to close the workflow editor, click Save and Submit.
- If you want to keep working but save your changes locally, click Save Progress.
- If you want to make other changes to a review workflow, continue to Update the review workflow template.
- If you want to make other changes to a topic workflow, continue to Update the topic workflow template.
- If you are done updating the workflow, to close the workflow editor, click