Create a cross-reference link
When you're working on a document in the Oxygen-based editor, you can link to content that exists in Inspire as a DITA document. To link to content that exists in Inspire but is not a DITA document, use the File Reference option. To link to content that exists on a web page, use the Web Link option.
 Important:
You can only create a cross-reference to elements with ID values. An administrator can configure elements in the Element Management module and set Yes or No for the Needs Id property.
- If you need to reference an element that doesn't have an ID, contact your administrator.
- To configure elements, an administrator can follow the steps in Manage elements.

 Tips and tricks
You can also add cross-references from the left and right side panels:
If you're working with cross-references in XML editing mode, you see the following syntax:
- If you create a reference to content in a separate file, the file name is included:
<filename>#<rootId>/<elementId>- If you create a reference to content that exists in the same file, DITA assumes it's the same, so the file name is dropped:
#<rootId>/<elementId>
To create a cross-reference link:
-
In the toolbar menu, click
 Link, and then select Cross Reference...
 If you previously inserted a cross-reference while working in this topic:
- Inspire skips the step where you select a component.
- Inspire automatically opens the last topic you used to insert a cross reference.
- To choose a new component to reference and open the Select Component screen, in Target file, click
 the folder.
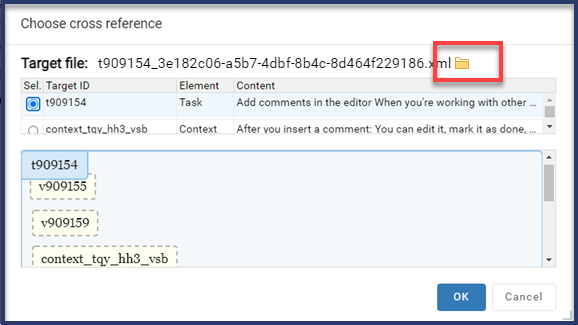
-
On the Choose cross reference screen, click OK.
You'll see a link icon next to the cross reference.If you make changes to links and references, you can ensure the most up-to-date information is being displayed by following these steps:
- Go to the toolbar.
- Click the Refresh references icon
 .
.
-
To test the link, hover your cursor over the linked text, press Ctrl and click the link.
The linked component is opened in a new tab and displays in one of the following ways:
- If the file isn't locked, you see it in the Oxygen editor.
- If the file is locked, you see it in a read-only viewer.
After creating a link, you can Copy a reference between components.
After creating a link to another component, Inspire tracks the relationship.- If the following statements are both true:
- An administrator has enabled an optional feature to help you manage referenced content
- Changes are made in the referenced component that impacts the reference
- The user is warned that this referenced component will be updated also.
- For more information, read Save changes in referenced components.