Create an AI index for approvals
As an administrator, you can create an index to store data if you have your own proprietary chatbot. An approval index that stores numerical representations of data that is saved after a user goes to the Components browser and selects the Approve option and either signs or confirms the approval.
 To access this premium feature, you must purchase it separately. Please contact your Vasont customer representative.

 Before you begin
- Before you can create an AI index, an administrator must have enabled the feature. Follow the steps in: Enable creating an AI index for approvals.
- Images are not supported in an AI index.
 Tips and tricks
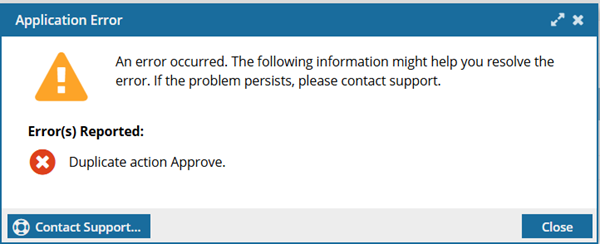
- You can only create one index per action. If you try to create another index for the Approve action, you see the following error:
 If an index already exists for an action and you want to replace it, you must delete it and then you can re-create an empty index.
To create an AI index for approvals:
-
From the
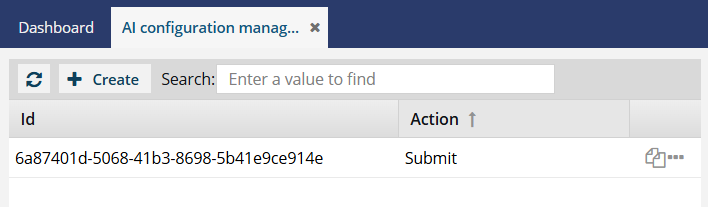
 Administration menu, select Advanced Settings, and then AI configuration management.
-
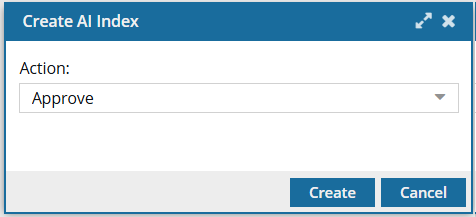
On the Create AI Index screen:
-
Click Create.
 Results: The Create AI Index screen closes. You see the AI Index for Approve in the list.
Users can now add content to the index by:
- Opening the Components browser, right-click an unapproved component, and select the Approve option.
 If a user selects a component that has not been approved, they will see an error that unapproved component will not be added to the index.
If you need to reference the AI Index ID, you can quickly copy it to the clipboard by going to the ID's row and clicking the  Copy to clipboard icon.
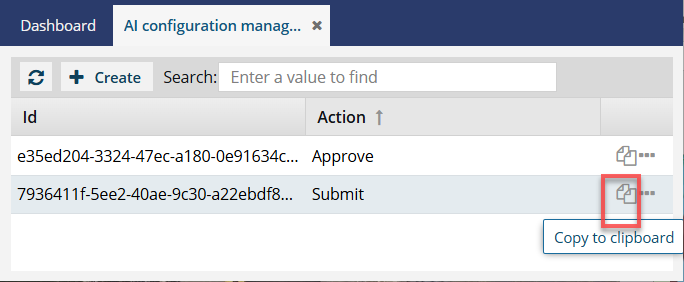
-
Click Create.