Update a translation configuration

After you create a configuration to reuse a group of translation options repeatedly, you can update the configuration if you need to change the options or values.

Tips and tricks

  • You must be an Administrator to work with translation configurations.
  • You can update as many options as you need in the configuration. Only Name and Translation Project are required.
  • The values you set in the configuration are all used on the Translate Component screen, including for the Filter option which opens the Filter Profiling Attributes screen.
  • The translation coordinator can override the settings in the translation configuration before clicking Translate.

Project Director has been renamed to GlobalLink Enterprise.

To update a translation configuration:

  1. Update translation configuration details.
  2. Optionally update any Attributes.
  3. On the Update Translation Configuration screen, click Update.

    Results:

    • The Update Translation Configuration screen closes.
    • You see the new configuration in the list on the Translation Configuration tab.

Update translation configuration details

  1. From the Administration menu, select Translation settings, and then Translation configuration management.
  2. In the list of configurations, find the one you want to update.
  3. At the end of the configuration's row, click Update.
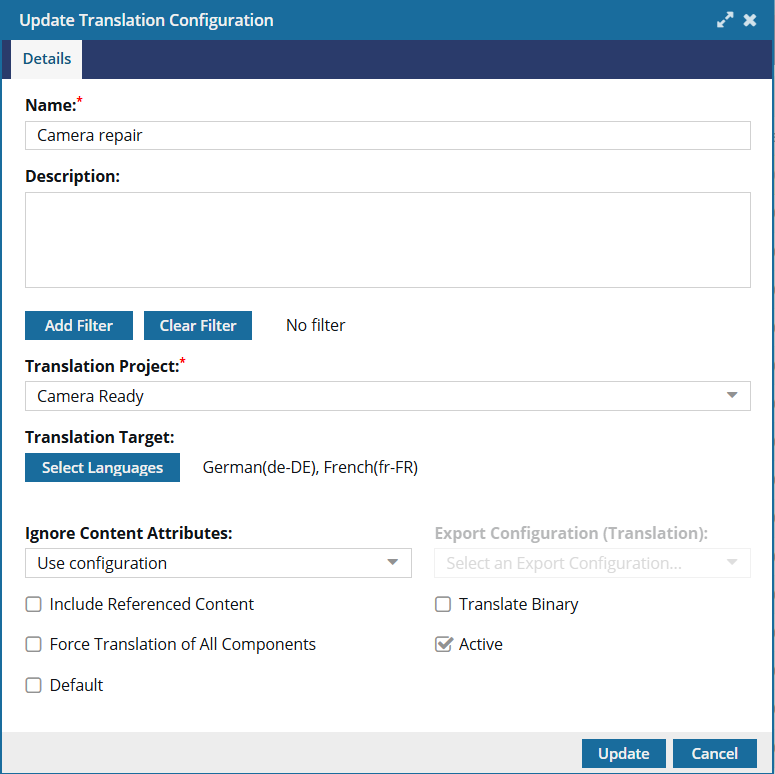
  4. In Name, update the title using 100 characters or less.
  5. Optionally, in Description, add or edit details about when to use this configuration in 1000 characters or less.
  6. Optionally, you can include content for translation only if it has a specific profiling attribute.
    1. To update filters already chosen or to add a filter:
      i. click Add Filter.
      ii. On the Filter profiling attributes screen, update the options for the attributes you want included in this configuration.
      iii. Click Select.
      Any component that doesn't include the attributes you select won't be sent to translation
    2. To clear all filters already chosen, click Clear Filter.
  7. To identify how the translation work will be completed, choose a Translation Project. Depending on how your organization configures Inspire, you select one of the following:
    • The method for sending the files (PD Rest Api, Manual, GlobalLink Portal (formerly Transport), GlobalLink Connect)
    • The client or vendor name
  8. If you selected a Translation Project that uses integration with GlobalLink Enterprise (formerly known as Project Director)(PD Rest Api), select the Translation Workflow to use in GlobalLink Enterprise.
    • Pseudo - content is translated using machine translation
    • Human - content is translated using a human linguist
    • Pseudo review - content is translated using machine translation and reviewed by a human linguist
  9. Optionally, to select the language you want this component translated to, in Translation Target, click Select Languages.
    1. On the Select translation languages screen, select any of the following:
      Language groups - To see only groups, click the Collapse down arrow next to the group names in bold. To see the languages in a group, click the Expand sideways arrow next to the group name in bold. Select a group to automatically include all the languages in the group.
      Individual languages - To see an individual language in a collapsed group, click the Expand sideways arrow next to the group name in bold. Select an individual language from a group or from the language list below the groups.
    2. On the Select translation languages screen, click Select.
      Result: The languages you chose are listed after Select Languages.
  10. Optionally, your organization can configure Inspire to ignore changes made only to attributes. In Ignore Content Attributes, select one of the following:
    • Use configuration - this is the default setting. It tells Inspire to check the Translation Attribute Management settings to ignore only the attributes that your organization has identified (marked with Ignore as content change set to True).
    • All - this setting tells Inspire to ignore all topics where the content hasn't changed but the attributes did.
    • None - this setting tells Inspire to send all content to translation regardless of attribute changes.
    For example, if the only changes made to a topic are attributes used to define where page breaks are, you don't want to run this topic through translation again and incur unnecessary costs.
  11. Optionally, to let Inspire add components to this job automatically if any topic references them, select Include referenced content.
  12. If you selected the Include referenced content option, in Export Configuration, select Translation unless you've created a custom export configuration you want to use instead.
  13. Optionally, to include content in the source components that isn't XML, such as images, select Include Binary.
  14. If you select a Translation Project that uses the PD Rest Api, you can optionally include a custom schema file in the translation job by selecting Include Schema.
    This is useful if your organization is using DITA specializations in Inspire by uploading custom XSDs. You can now include those XSDs in a translation job so the vendor can parse your XML files.
  15. Optionally, you can select Force Translation of All Components to overwrite the previous translation of all files in this job.
    If any files were previously translated and there have been no changes, Inspire won't translate the files again, even if you select them. Use this option if there was an issue with a previous translation and you want Inspire to translate files again.
  16. Optionally, if you selected a PD Rest API configuration in Translation Project, to add the Inspire Translation Job Id to the Submission Name, select Prepend Translation Job Id to Submission Name.
    This lets you see the Inspire Job Id in GlobalLink Enterprise (formerly known as Project Director).
  17. Optionally, if you want this configuration to be available to the translation coordinator on the Translate Component screen when they're sending files to translation, select Active.
  18. Optionally, if you want this configuration to be shown by default on the on the Translate Component screen when a coordinator is sending files to translation, select Default.
    • If you create only one configuration, it's automatically selected for the translation coordinator.
    • If you create multiple configurations, the one marked as Default is selected for the translation coordinator.

Optionally update any Attributes

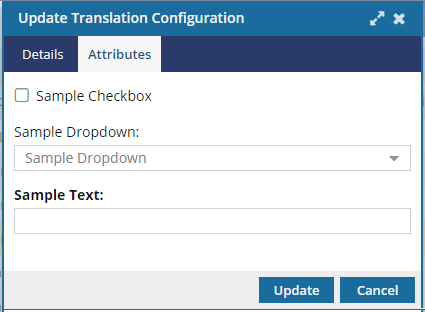
If you select a Translation Project that includes attributes, you see an Attributes tab.

If the vendor or project you select in Translation Project doesn't need attributes, you don't see an Attributes tab.

For more information on translation project attributes, read Send additional project details using attributes.

To update any optional Attributes:

  1. On the Update Translation Configuration screen, select the Attributes tab.
  2. To provide custom information for project types when content for translation, complete any custom fields on this tab. This information is unique to your company and customizable.