Make a user's seat Named
Named users can always log in regardless of whether there are any concurrent seats available. If you want to keep a user's seat type (Standard or Review Only) but make sure it is reserved, you can quickly change it on the Edit screen. If you want to change the seat type and make it Named, you can open up the user's information and editing both of those settings.
There are two types of Named seat options:
- Standard Named (The number of users that have reserved seats out of the number of seats in your license.)
- Named users can always log in regardless of whether there are any concurrent seats available.
- Standard users can access all features of Inspire by default but access can be limited in Inspire by an administrator.
- Review Only Named (The number of users that have reserved seats to access the Review module ONLY out of the number of seats in your license.)
- Named users can always sign in to access a review regardless of whether there are any concurrent seats available.
- Review Only users can only access the Review module in Inspire. An administrator cannot add access to any other modules for a user with this type of seat.

 Tips and Tricks
- To open the Inspire instance listed in the Application column, click the link in the Application name. For example, in the illustration above, you can click GlobalLink Vasont Inspire.
- If your License Manager session times out due to inactivity, you may be asked to authorize your corporate account before License Manager opens again.
- Signing out of License Manager does not sign you out of Inspire.
Keep the seat type and make it Named
You can keep a user's seat type (Standard or Review Only) and just change it to Named so it is reserved. To make these changes you can use the Edit screen.
To keep the seat type and make it Named:
-
To open License Manager:
-
In the top right corner of the Inspire menu bar, click
 the default profile picture or the one you previously added.
- Select My Profile...
-
In the top right corner of the Inspire menu bar, click
-
In License Manager, go to the menu on the left side and select
 Subscriptions
-
On the Subscriptions page, if you have more than one subscription, select the one you want to edit, and then click
 Edit. (If you have multiple subscriptions, the instance of Inspire you are managing is named in the Subscription's Domain Key.)
 At the top of the Edit (Subscription) screen you can see the number and usage of seats.
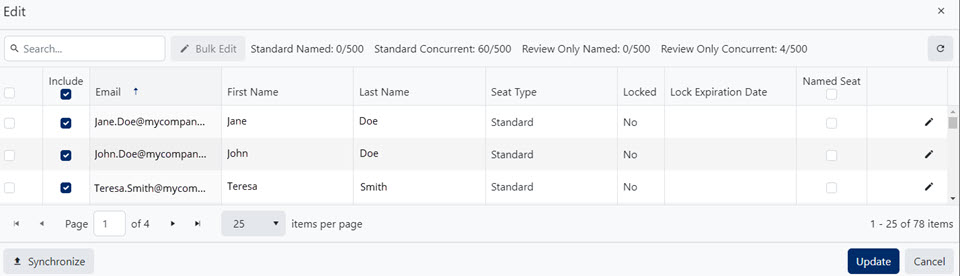
-
On the Edit (Subscription) screen, to save all your changes, click Update.
 Results: Your changes are saved to the instance of Inspire named in the Subscription's Domain Key.
  If you don't see the changes you made in Inspire, come back to the Edit (Subscription) screen and click
  the Sync button.
Change seat type and make it Named
You can review and change a user's seat type and make it Named by opening the user's information and editing both of these settings.
To change seat type and make it Named:
-
To open License Manager:
-
In the top right corner of the Inspire menu bar, click the default profile picture or the one you previously added.
- Select My Profile...
-
In the top right corner of the Inspire menu bar, click
-
In License Manager, go to the menu on the left side and select Subscriptions
-
On the Subscriptions page, if you have more than one subscription, select the one you want to edit, and then click Edit. (If you have multiple subscriptions, the instance of Inspire you are managing is named in the Subscription's Domain Key.)
At the top of the Edit (Subscription) screen you can see the number and usage of seats.
-
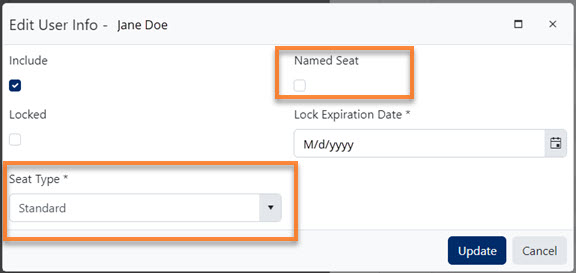
To see and change all settings for a single user settings, in the user's row, click Edit.
-
On the Edit User Info screen:

-
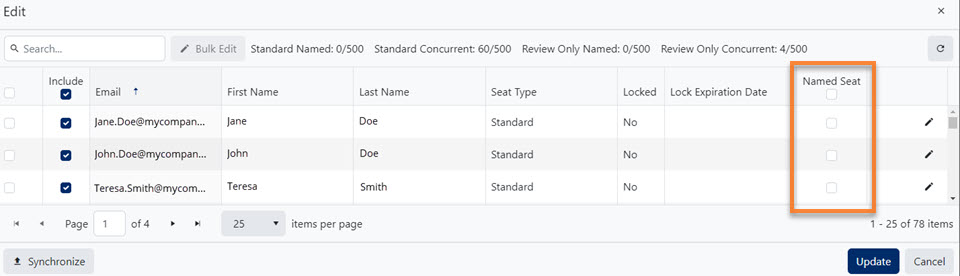
To manage the Named Seat option for this user:
Users with a Named Seat can always sign in regardless of whether there are any concurrent seats available.
- To reserve a seat for a user so that they can always log in regardless of whether there are any concurrent seats available, in the user's row, in the Named Seat column, select the checkbox.
- To remove a user's Named Seat and reduce it to a concurrent seat, in the Named Seat column, clear the checkbox.
-
To manage the Named Seat option for this user:
-
On the Edit (Subscription) screen, to save all your changes, click Update.
Results: Your changes are saved to the instance of Inspire named in the Subscription's Domain Key. If you don't see the changes you made in Inspire, come back to the Edit (Subscription) screen and click the Sync button.