Configure a GlobalLink project for quotes
In Inspire, you can allow queued translation jobs to be sent to GlobalLink Enterprise to get a quote on the cost of translation work. After a user requests an estimate, Inspire sends a request to GlobalLink Enterprise where a project manager or vendor provides the lines items for each charge and a total estimate. This requires you configure your translation project in GlobalLink Enterprise to allow the use of quotes.
 Before you begin
- These steps assume you have a translation project already created for Inspire-related translation work.
 If you can access the Administrator Guide for GlobalLink Enterprise, you can learn about creating translation projects there. Administration guidance is not provided in GlobalLink Answers.
- In Inspire, an administrator must also configure a Translation Integration Method to allow the use of quotes.
 Enable quotes for translation projects
To configure a GlobalLink project for quotes:
Allow the use of quotes in your translation project
In GlobalLink Enterprise, a project consists of a collection of business rules designed to meet specific requirements.
- A project includes target languages, file formats, workflows, and vendors.
- GlobalLink Enterprise associates submissions with projects, so projects are a prerequisite to submissions.
To allow the use of quotes in your translation project:
-
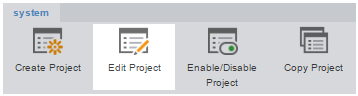
In the Projects folder, select the project you use for Inspire translations, and then click Edit Project.
-
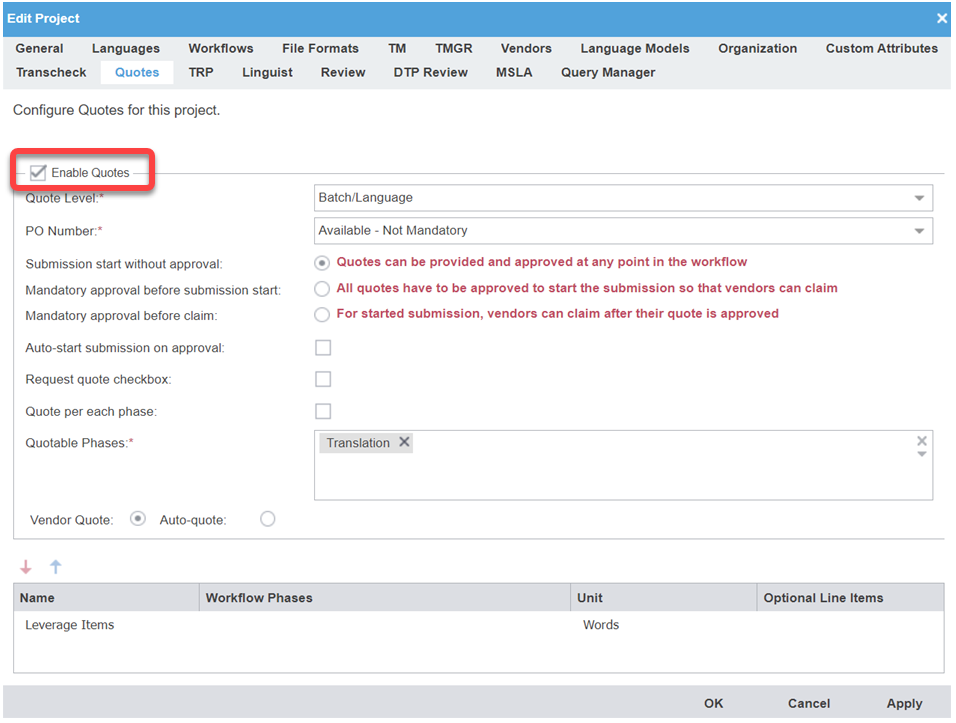
On the Edit Project screen, click the Quotes tab.
-
In the Quote Level drop-down list, select an option.
Inspire allows an administrator to enter any value in the Quote Level setting so you can match exactly what is selected here in GlobalLink Enterprise.
-
Click OK to save your changes.
 Results: Your quote configuration for the selected project is saved.
Set the Quote Level
 Tips and tricks
- In the translation and localization world, quotes can include the following types of work items:
- Leverage. This type of item refers to any portion of text that does not need to be translated from scratch because it can be reused from previous work. Leverage can be full, partial, or repeated.
- Full. Segments that match 100% with the Translation Memory are considered full leverage because they can be reused as-is.
- Partial. If a segment is similar but not identical, it becomes a fuzzy match (e.g., 75–99% match). These are partial leverage items because the translator only needs to edit, not translate from scratch.
- Repeated. If your document repeats phrases or sentences, those repetitions are also leverage items. Vendors typically charge less for repeated segments.
- Line. This type of item refers to any portion of text that needs to be translated from scratch because it did not appear in any previous work.
- Leverage. This type of item refers to any portion of text that does not need to be translated from scratch because it can be reused from previous work. Leverage can be full, partial, or repeated.
- Quotes can help you understand the true cost before committing to work, compare vendors objectively, and get visibility into your content. Quote levels help you identify what level of work goes into a vendor's cost estimate.
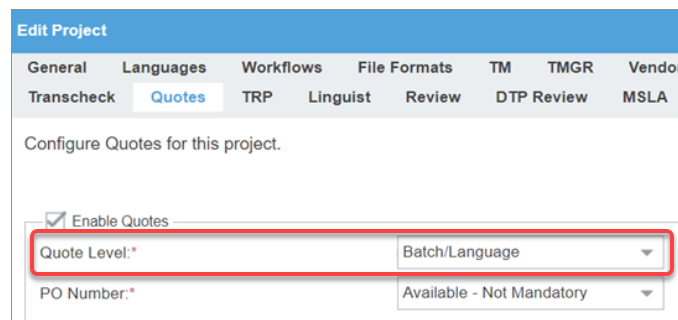
To set the Quote Level:
-
In the Projects folder, select the project you use for Inspire translations, and then click Edit Project.
-
On the Edit Project screen, click the Quotes tab.
-
In the Quote Level drop-down list, select an option.
Inspire allows an administrator to enter any value in the Quote Level setting so you can match exactly what is selected here in GlobalLink Enterprise.
-
Click OK to save your changes.
Results: Your quote level for the selected project is saved.
Configure associated vendors
You must check the vendors associated with your Inspire translation project to ensure they provide translations in the languages you want to use with quotes.
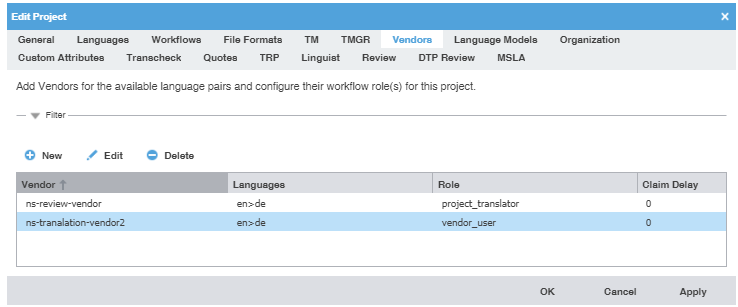
In the example above, your translation project only works with Source files in English (EN) that can be translated into German (DE).
 If an Inspire user creates a translation job for GlobalLink Enterprise and selects a Target language of anything besides German (DE), the job with fail because you don't have a vendor who can do the translation.
To allow your Inspire translation projects to work with all the languages you need, in GlobalLink Enterprise you can add new vendors who work with other languages or update an existing vendor who may have added more services.
To configure associated vendors:
-
In the Projects folder, select the project you use for Inspire translations, and then click Edit Project.
-
Review your list of vendors and the language pairs they work with. If you need to, do any of the following:
-
To add a vendor, click New.

- Select the checkbox of the Source and Target language pairs to enable them.
- Click OK.
-
To add more languages to an existing vendor, select the vendor and then click Edit.
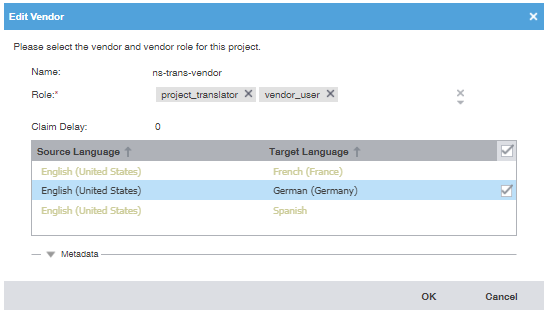
- Select the checkbox of the Source and Target language pairs to enable them.
- Click OK.
-
To add a vendor, click New.