Update translation details
You must have permission to be a translation coordinator or an administrator before you can work with translation jobs. After you've sent a job to translation, but before the work is completed by the vendor, there are some details you can update.
 You must have permission to be a translation coordinator or be an administrator before you can send a component to translation or manage a translation job.

 If a translation job has only been Queued and not Submitted yet, the details you can change are the same as if the job is In Progress. For more information, refer to Update a queued translation job.
![]()
Details you can change
- On the Details tab: Name (of the job), Description, and (Translation) Coordinator
- On the Languages tab: Cancel (a language)
- On the Components tab: Cancel (a component translation)
- On the Integration tab: nothing
- On the Reference only tab: nothing

Details you can't change
When you're updating job details, the following settings are shown for your reference but can't be changed after a translation job is submitted: (If you need to make changes to these job parameters, you can cancel the job and re-create it with the correct information.) Read-only settings:
- On the Details tab: Source Component Id, Due Date, Target Languages, Translation Project, Total Words Sent for Translation, Filters (for attributes), Include referenced content, Export Configuration (Translation), Translate Binary, Force Translation of All Components
- On the Languages tab: Languages (you can't select new languages)
- On the Components tab: Components (you can't select new components)
- On the Integration tab: Submission Request Information, Submission Response Information, Retrieval Request Information, Retrieval Response Information
- On the Reference only tab: Name, File Name (You only see this tab if you sent the job to GlobalLink Enterprise -formerly known as Project Director.)
To update translation details:
-
Select
 Translations.
-
On the Translations Management tab, in the list, find the translation you want to modify. Make sure it's in the Translating state.
On the Translation Management tab, you see a list of translation jobs filtered by your role.
- Both administrators and translation coordinators are able to view translation jobs created by themselves as well as those created by other users.
- Translation coordinators who aren't also admins can select or clear the See All option to filter the list.
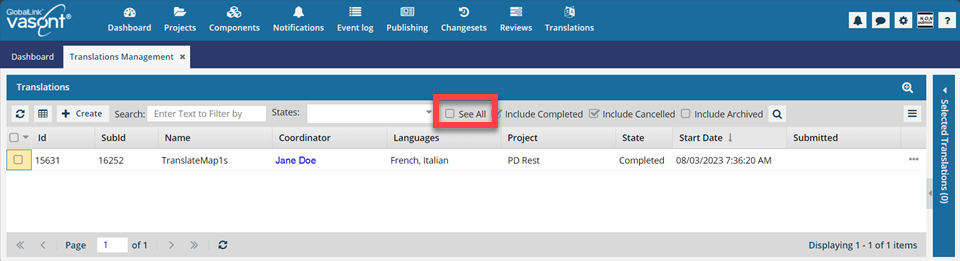 After you select the See All option, you must click
  Search to see an updated list of jobs.
 - Translation coordinators who are also admins don't get the See All option because as an Admin they can already see all jobs in the organization.
- Translation coordinators who aren't also admins can select or clear the See All option to filter the list.
- Users who don't belong to either of these roles don't get the See All option and can only see the translation jobs they created.
 If you can't find the job you're looking for, do any of the following:
- If there are multiple pages, scroll to the next page using the controls at the bottom of the list.
- Sort the list by clicking a column heading.
- Search for items in the list that contain a key word or phrase.
- Limit the list to show only jobs in a specific state. Go to States, select an option, and then click the search icon
 .
. - Show hidden jobs by selecting the checkbox for Include Archived. By default, the options for Include Completed and Include Cancelled are selected
- Both administrators and translation coordinators are able to view translation jobs created by themselves as well as those created by other users.
-
To open the Update Translation dialog, right-click the job or click
 the Options menu to select Update.
-
To cancel the use of a language in the translation job, select the language, click the Options menu, and then select Cancel.
-
To cancel the translation of a component in the translation job, select the component, click the Options menu, and then select Cancel.
-
To save your changes, click Update.
 Results:
- As the translation coordinator, you'll receive an email notification that the translation job was updated.
- When you complete a task that triggers a notification, such as managing translation jobs, the Slack and email message bodies contain:
- The notification with ten or less Issues, Errors, and Warnings.
- A link at the bottom of the message [See Full Version].
- You can click the [See Full Version] link to expand a section under the link with the full details.