Publish multiple project components with tokens
You can use characters reserved for XPath and system variables in the publishing job Name. This lets you pull in data so that you don't have to type it in every time you send the project component out for publishing. To publish multiple components, you can use the Contents pane to select the checkbox for all components you want to publish at the same time. Then you can use the Selected Components pane to open the Publish Component screen.
 You may not have permissions to publish under the following conditions:
- A content owner or administrator can set permissions to deny access to components or folders. If your permissions to content have been blocked, and you are not an administrator, you can use the Publish option in a project's Content pane, but it will fail with a warning.
- An Inspire administrator can define at the user and role level whether the Publish action is available.
- By default, only administrators can publish content in Inspire.
- You can see the Publish option only if you're an administrator or have the can_publish module property.

 Tips and tricks
- Tokens can also be used in a publishing profile. For help using tokens in a publishing profile, follow the steps in Publish from a profile with tokens.
Examples of ways you can use a token in the job's Publish Name field:
- To add the name of the MyMap component, use
{$componentname} Example Publish Name = MyMap
 - To add the topic title of the MyMap component, use
{$title} Example Publish Name = UserManual - To add the file name of the MyMap component, use
{$filename} Example Publish Name = MyMap_ceb80930-0712-48d2-92a5-9c2ee7d2ff7d.xml - To add the current date and time to the job name for MyMap, use
{$datetime} Example Publish Name = MyMap2024-04-30-111017 - To add the name of the user who created the publishing job for MyMap, use
{$username} Example Publish Name = MyMapjanedoe@mycompany.org - To add the code for the language used in the component MyMap, use
{$langcode} Example Publish Name = MyMapen-US - To add the name of the language used in the component MyMap, use
{$langname} Example Publish Name = MyMapEnglish  If you need a system variable that isn't in the list of examples, contact your Inspire support representative.
- To add the name of the MyMap component, use
To publish multiple project components with tokens:
-
Click
 Projects.
-
On the project tab, in the Content pane, to open the Content folder, click the expand arrow
 .
.
-
In the Content pane, select the checkbox for the components you want to publish.
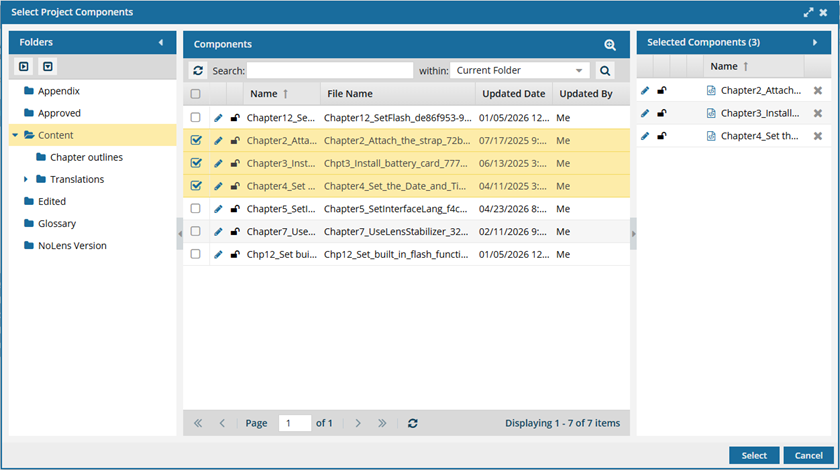
 To see the complete name of the components and use advanced search to search through all folders within a project, click
  the Select Project Components option.
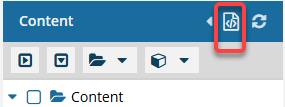
- To see more text in the Components pane, collapse the Folders panel by clicking
 the arrow that's pointing left.
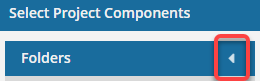
- To quickly expand or collapse the folders, use the
 expand all and
  collapse all buttons.
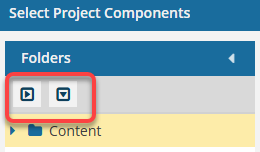
- To find a component by keyword, in Search, enter words or phrases used in the component's name. In Within, select where in the project you want to search (Current Folder, Current and Subfolders, All Folders). Click Search
 .
. - To find a component by creating a query, click
 Advanced Search.
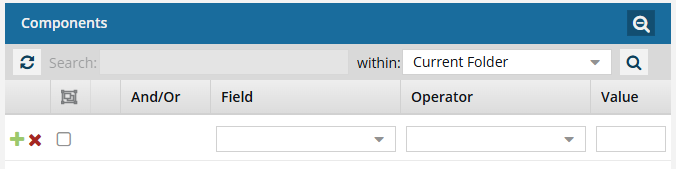
- Fields correspond to the columns in the grid. In the Field list, select the column you want to search in, such as Component State.
- After you select a Field, you must describe the relationship it has with the Value. In the Operator list, to include or exclude some or all of the values that you want to use, select an operator, such as
<>(not equal to). - The options in the Value list change depending on what you selected in Field. In the Value, select or enter the word, phrase, or number you are searching for in relation to the Field. For example, Component State (Field)
<>(Operator) Invalid (Value). - In Within, select where in the project you want to search (Current Folder, Current and Subfolders, All Folders).
- Optionally, to enter another clause to your query, click
 Add. Select whether you want to narrow your search by requiring that all statements must be true (And), or expand your search by requiring that any of the statements can be true (Or).
 - Click Search .
- To select multiple components to manage, select the checkbox for each component.Result: The components are listed on the Selected Components panel.
- To close the Select Project Components screen, click Select.
- To see more text in the Components pane, collapse the Folders panel by clicking
-
On the Selected Components pane, click the Publish icon
 .
Result: The Publish Component screen opens.
.
Result: The Publish Component screen opens.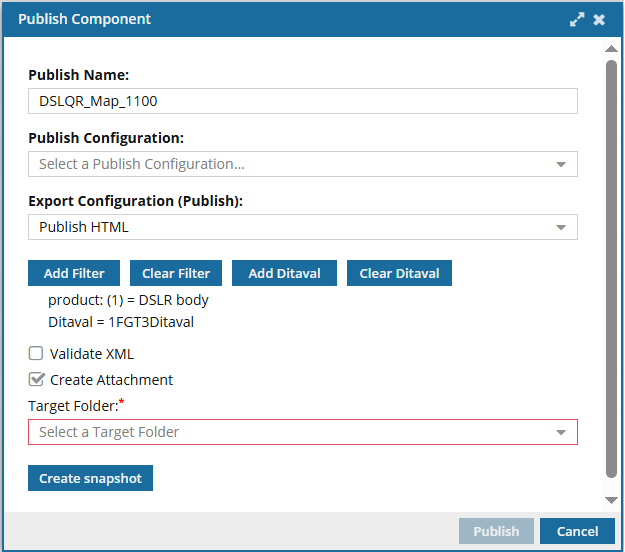
-
On the Publish Component screen, the default Publish Name field is empty. You can add a custom name using 1000 or fewer characters.
To add a token, do the following:
- To the name, add a token using the following format:
{$variable} To create multiple tokens, use the following format:
{$variable}-{$variable}-{$variable} The total number of characters used in the name cannot exceed 1000. If you include multiple tokens in the Publish Name, and the final Publish Name exceeds 1000 characters, then you see a warning.
 - The Publish Name will be truncated.
- The tokens will still be used, but with a truncated final name.
- Important:
- Replace
variablewith the name of a system variable used by Inspire. - If you add a variable to the publishing job Name that XPath can't find, the component is published, and Inspire adds the unknown variable as text to the job Name. For example: MyMap_{$blueskies}
- In your notifications, you see a publishing job Name of MyMap_blueskies.
- The name of the published deliverable will not include the unknown variable as text. Deliverables are named using the following default format: Publish-{ComponentName}-YYYY-MM-DD-HHHHMM. However, an administrator can configure Inspire to omit the timestamp from the published file name.
- You can use up to 1000 characters to specify tokens. However, if the resolved tokens are more than 1000 characters, they will be truncated.
- Replace
- To the name, add a token using the following format:
-
Optionally, on the Publish Component screen, in Publish Configuration, you can select the option that contains the publish settings you want to use.
This configuration is created by an administrator and includes settings such identifying the export process to use, validating XML, and using profiling attribute filters.
If the Publish Configuration contains a Publish Name, it will overwrite your custom name and the tokens you just added.- You can clear the name used in the Publish Configuration and re-enter your custom name and tokens.
- You can also ask your administrator to add the tokens to the Publish Configuration so that it will always be available in the Publish Name.
An administrator can choose a Publish Configuration to be shown automatically as the default. If you need to use something other than the default, you can select another option. The same settings on the Publish Component screen can also be set by an administrator in the Publish Configuration.- If you select options on the Publish Component screen, your settings are used even if they are in conflict with the Publish Configuration that an admin creates.
- If you select options on the Publish Component screen that don't conflict with the Publish Configuration that an admin creates, then both sets of options are used.
 For some customers, Inspire provides a publishing configuration and a publishing plug-in for DOCX. If it's supported for your organization, you can select the Publish Docx option.
 -
Optionally, you can select a DitaVal file that exists in Inspire.
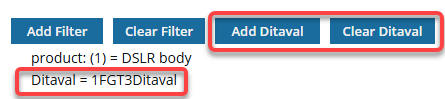 You can select only one DitaVal file.
-
Select the checkbox for a DitaVal file and click Select.
Result: You see the name of the DitaVal file you selected on the Publish Component screen listed under the Add Filter and Clear Filter buttons.
-
Select the checkbox for a DitaVal file and click Select.
-
On the Publish Component dialog, click Publish.
Result:
In the top-right corner, you see a message that Inspire is preparing your publishing job.

After Inspire successfully submits the job, you receive a notification that you can review on the Notifications tab, in Slack if it's configured for notifications, and in email.
 When you complete a task that triggers a notification, such as publishing content, the Slack and email body contain:
- The notification with ten or fewer Issues, Errors, and Warnings.
- A link at the bottom of the message [See Full Version].
- You can click the [See Full Version] link to expand a section under the link with the full details.
- Finding your publishing request by name. By default, when you select one component to publish, Inspire provides a Publish Name using the component's File Name without the GUID.
- The Publish Name you use on the Publish Component screen is shown on the Publish portal in the Title column.
- If you use a token in Publish Name, and Inspire can resolve it, the token appears in the following places with the token replaced by actual data:
- On the Publish portal in the Title column.
- In the deliverable name using the following default format: Publish-{ComponentName}{token}-YYYY-MM-DD-HHHHMM. However, an administrator can configure Inspire to omit the timestamp from the published file name.
- If you use a token in Publish Name, and Inspire can resolve it, the token appears in the following notifications, if you have them turned on:
- In-app publishing notifications for queued, submitted, and completed.
- Slack publishing notifications for queued, submitted, and completed.
- Email publishing notifications for queued, submitted, and completed.
If you add a variable to Publish Name that XPath can't find, Inspire adds the unknown variable as text to all names and notifications except for the deliverable name.
For example, if you use a non-system variable:
MyMap_{$blueskies}- In your notifications you see a Publish Name of MyMap_{$blueskies}.
- The name of the published deliverable will not include the unknown variable as text. Deliverables are named using the following default format: Publish-{ComponentName}-YYYY-MM-DD-HHHHMM. However, an administrator can configure Inspire to omit the timestamp from the published file name.
- Keep the following naming issues in mind:
- The Publish Name is not the same as the deliverable (published content) name.
- You can create whatever Publish Name you want.
- Deliverables are named by Inspire using the following default format: Publish-{ComponentName}-YYYY-MM-DD-HHHHMM. However, an administrator can configure Inspire to omit the timestamp from the published file name.
- The Publish Name is not the same as the deliverable (published content) name.
- Finding your deliverables.
- You can download your deliverable from publishing notifications or in Publish Server.
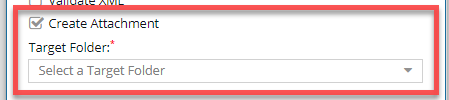
- You can also find the deliverable in Inspire if you selected the Create Attachment option when you were configuring settings on the Publish Component screen. You can find a copy of the published deliverable in the Target Folder you selected.
After the publishing job completes successfully:
- A copy of the published deliverable is imported back into Inspire automatically as a binary file.
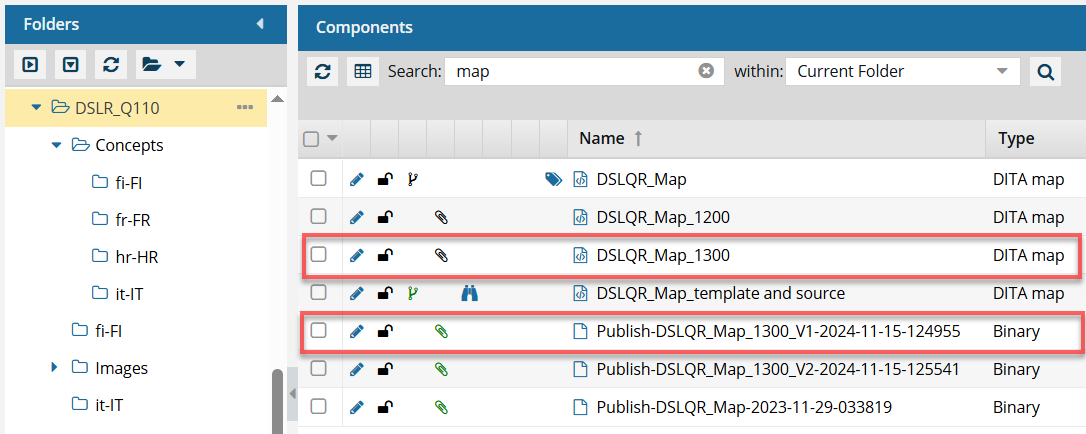
- A relationship between the component you published and the deliverable that was imported is created.
- In the Component's Browser, the component you published now has
 a black paperclip before its name. This indicates it references another component as an attachment.
 - In the Component's Browser, the published deliverable has
 a green paperclip before its name. This indicates it is referenced by another component as an attachment.
 - For more information on attachment relationships, read: See component attachments.
- In the Component's Browser, the component you published now has
You can use Publish Server to view job status and history, download files related to a job, and republish content from an existing job. To learn about job management, read Welcome to Publish Server.Tips and tricks- Open Publish Server from a link in the following places:
- In your
 notification after you submit a publishing job or Open and manage messages on the Notifications tab
 - On the
 Publishing tab by clicking Go to Publish Server
- In your
- For the following Inspire publishing formats, you download a ZIP file that includes multiple files:
- HTML
- For the following publishing formats, you download a single standalone file:
- DocBook PDF
- DocBook HTML
- DOCX
- When you use the Zoomin publishing option, you must open the notification and use the link to go to the Zoomin site.
- For custom publishing options, you can configure the publishing deliverables.