Import translated components
These steps are only necessary if you sent a job to a translator manually or if you encounter delivery issues from any vendor type. You can import directly from the Translations Management tab and allow Inspire to place the files in the correct folder(s).
 Tips and tricks
ZIP files
Inspire sends you a ZIP file that you can forward to the vendor. The ZIP file contains the target language components that are placed into folders for each target language.
Exported components use the following format:
Export-{Component Name}-{date/time}.zipFor example,
Export-Cloud_Computing-2022-12-21-03588.zip{Component Name}is the source component you select.
The Component Name is truncated after 50 characters.
- By default, Inspire uses absolute paths in the ZIP file.
- Examples of an absolute path:
<topicref href="E:/Mycompany/Project1/Content/tasks/topic1.dita/>"href="E:\MyCompany\Project1\Content\Topics\overview.xml"
- Examples of an absolute path:
 If you import a ZIP file that contains folders and references that use a shorthand syntax (#./), the imported components show a valid relationship regardless of whether an administrator configures Inspire to Allow internal links to use a short format.

Overwriting the placeholders
When you import the translated files, you'll overwrite the original copies in the language folders. Inspire created these files as placeholders when you started the translation job. You aren't losing any information when you overwrite the files because the content you sent for translation still exists in the ZIP file Inspire sent you.

Generating element IDs
When you import an XML file with elements, Inspire will either assign a unique ID to all elements that don't have one, or only to supported elements. If you are an administrator read Create automatic IDs for all elements.
File names must be 100 characters or less
- When you create a component in Inspire, you must use a file name of 100 characters or less.
- When you export a component, a GUID (globally unique identifier) is added to the file name.
- When you import a file back into Inspire, the file name and GUID together must not exceed 200 characters.
 If the file name and GUID length exceeds 200 characters, Inspire won't import the file.

 When you import files from the Components and Projects tabs, Inspire checks the files to see if they are already in an active translation job.
If the files you are importing are part of an active translation job:
- The entire import will fail, even if some files are not part of an active translation job.
- You see an error message: You are trying to import files that are part of an active translation job. Use the "Import translation" action in the translation management tab instead.
- You see one error for each file you are trying to import that is part of an active translation job. File ({fileName}) was found in translation job ({translation job id}).


Import from Translations Management
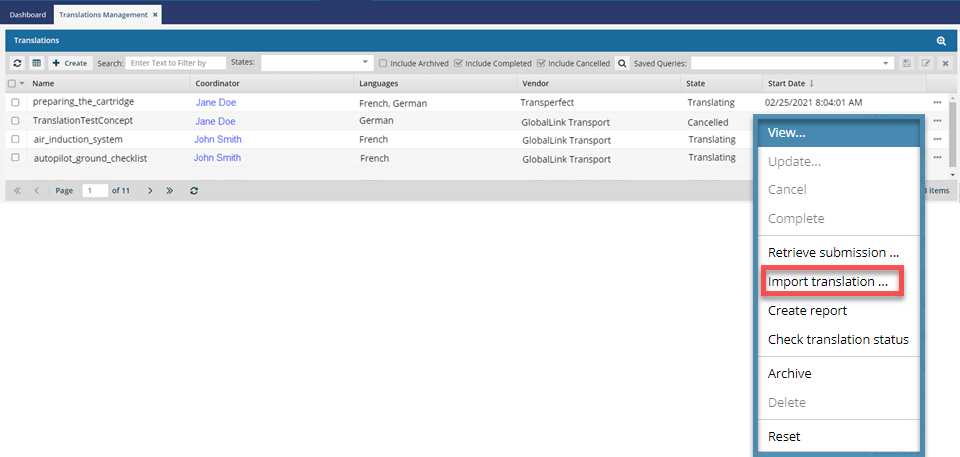
If you sent a job to a translator manually or if you encounter delivery issues from any vendor type, you can import a ZIP of the translated files directly from the Translations Management tab.

 Tips and tricks
- You must be an Administrator or a Translation coordinator.
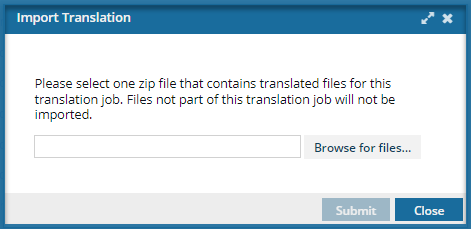
- On the Import Translation screen, you can select only one zip file.
- The translation job must not have a State of Archived.
- The translation job must have a State of Completed or Cancelled.
- Make sure you Understand the translation process.
 If the file is unchanged, Inspire will still import it you will see a notification about this action.


To import translated files after delivery issues:

 the Options menu to select
  Results: