Control if a lock is set after approval
Users can let others know if a component is in a state of completion by giving it an approved state. A component can be approved in the Components browser, in a project, or when resolving a review. As an administrator, you can control if a system lock is placed on the component after a user approves it. If the component is locked, it can only be opened in a read-only viewer.
 Tips and tricks
By default, any administrator or most users can mark a component as Approved.
 To approve a component, you must have at least one of the following roles or permissions:
- Be an administrator.
- If special permissions are required, you must be added to the Content Browser's can_approve module property. Admins can follow the steps in Control who can approve components.
- If special permissions are not required, you must have permissions to update the component.
Otherwise, users see a greyed out Approve option.
 If a user has permission to approve components, they can do so regardless of whether or not you require electronic signatures.
By default, LockforApprove is set to false.
- If you set LockforApprove to true and the user has permissions to approve components:
- A system lock is placed on the component to prevents unauthorized changes.
- The component can only be opened in a read-only viewer.
- Some actions cannot be performed on a file that is locked.
- If you set LockforApproved to false:
- The component remains in the Draft state.
- The component can be edited in the Oxygen editor.
- The user can perform actions on the file that are allowed for unlocked files.

To control if a lock is set after approval:
-
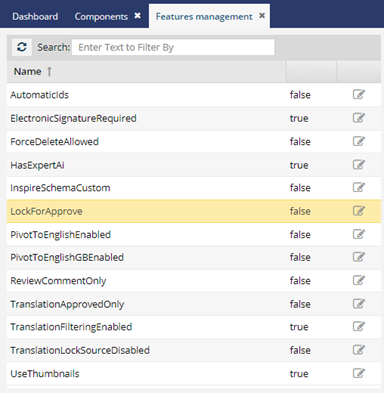
On the Features Management tab:
- After LockforApprove, note the state. If the feature is enabled, it says true.
-
After LockforApprove, click
 Update.
-
The checkbox is highlighted in blue. To change the state, clear or select the checkbox.

- To enable the feature, select the checkbox.
- To disable the feature, clear the checkbox.
-
Click Update.
 Admin users must log out and back in to see the changes.