Allow another user to delete your comment
As an Inspire administrator, you can set permissions to grant or deny users and roles access to a specific module. By default, when a user opens a component in the Oxygen editor, they can see comments made by other users but can only delete their own comments. If you want to configure Oxygen behavior for a user or role so that a user can delete another user's comments, you can add them to the Content Browser module's allow_delete_other_comment property in Module Access Management.
 Tips and tricks
The allow_delete_other_comment property shows the  Remove button in a comment's action buttons, even if the current user editing the component did not create the comment.

- This button is available when a user clicks in the changed text in the Oxygen editor, opens the right side panel, and goes to the
 Comments pane.
 - By default, a user can only see the Remove action button if they created a comment.
- If you add a non-administrator user or role to this property, then the user or role can do the following even if they did not create the comment:
- Can see the comment text in the Comments pane
- Can
 reply to the comment
 - Can
 edit the comment
 - Can Remove one comment or all comments
- Can mark the comment as Done

- Can see the comment text in the
 The settings for these properties do not apply when editing a component in a review.

To allow another user to delete your comment:
-
From the
 Security menu, select Module access management.
-
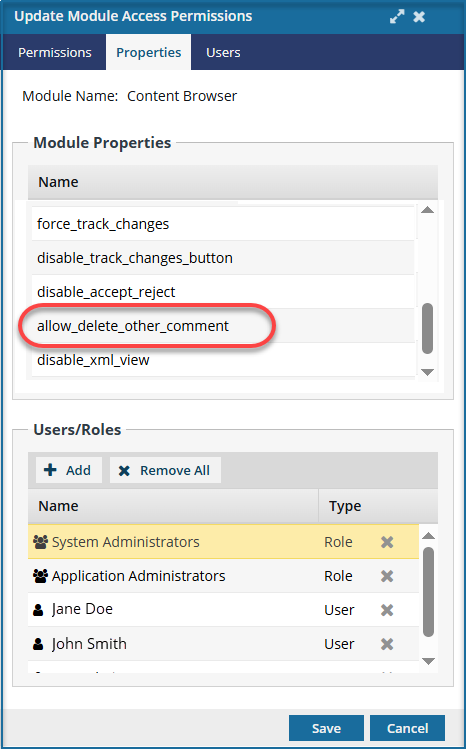
On the Module access management tab, select Content Browser, and then at the end of that row click Update
 .
.
-
In Users/Roles, click
 Add.
Add.
 On the Select Users screen, if the list is large or you only want to see a certain type of user, you can narrow the list in the following ways:
- To see only names that contain a word or specific letters, in Filter, enter text. For example you can find names that contain "admin", or "review". You can't search for text in any other column except Name.
- To see all users sorted by Name, Security Type, or User Type, click the column heading and then click the grey arrow. To sort by Name or User Type you can also use the Sort By drop-down box.
- By default, names with a User Type of Support are not included in the list. To see these users, select the Include support users option.
-
After you finish selecting users or roles, click Select.
 Results:
- You see your selection(s) added to the Users/Roles list.
- You return to the Permissions tab of the Update Module Access Permissions screen.
-
On the Update Module Access Permissions screen, click Save.
Results:
- You are returned to Module Access Management screen.
- Any users whose access you changed must log out and back in to see the changes.