After you create a customized schema, if you need to change the details, you can edit the details and upload a revised schema framework.

 You must have administrator permissions in Inspire to complete this task.

To update a custom schema:
-
From the
 Administration menu, select Advanced settings, and then select Component schema management.
-
On the Component schema management tab, find the schema you want to update, select the row, and then click
 Update.
-
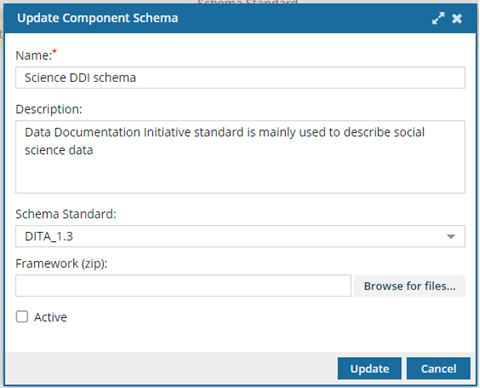
On the Update Component Schema dialog, in Name, edit the title for your custom schema using 50 characters or less.
-
Optionally, in Description, you can edit details about the customization or when the schema should be used in 1000 characters or less.
-
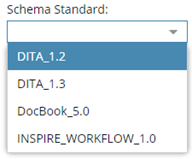
In Schema Standard, select the type of structure (DITA, DocBook, Inspire) and the version.

 You can't edit the list of options in Schema Standard. These are the schema standards that Inspire currently supports
-
To select a Framework:
-
Click Browse for files...
-
On the Open dialog, find the schema framework saved as a ZIP file, and click Open.
-
By default, the Active option is selected. When Inspire looks for schemas to use, only those marked as Active are identified. If you don't want Inspire to identify this schema as available, clear the option.

The
Active checkbox is useful if you want to test schemas. For example, you can upload two schemas and switch back and forth between them.
-
On the Update Component schema dialog, click Update.
You see the Component schema management tab and the details about your updated schema.
-
Assign a custom schema to a component type.

![]() You must have administrator permissions in Inspire to complete this task.
You must have administrator permissions in Inspire to complete this task.

 Update.
 You can't edit the list of options in Schema Standard. These are the schema standards that Inspire currently supports