Save a component as a new component in a project
As a quick way to duplicate a component and add it to a project, you can use the Save As option. The duplicate component is saved in a folder in the Components browser and added to the project's Content folder.
 A content owner or administrator can set permissions to deny access to components or folders. If your permissions to content have been blocked, and you are not an administrator, you cannot use the Save As option in a project's Content pane.

To save a component as a new component in a project:
-
Click
 Projects.
-
In the Content pane, expand the content in any of the following ways:
- To expand the Content folder and all sub-folders, click Expand all
 .
. - To browse the components and folders list, to the left of Content older, click the Expand one arrow
 .
.
- To expand the Content folder and all sub-folders, click Expand all
-
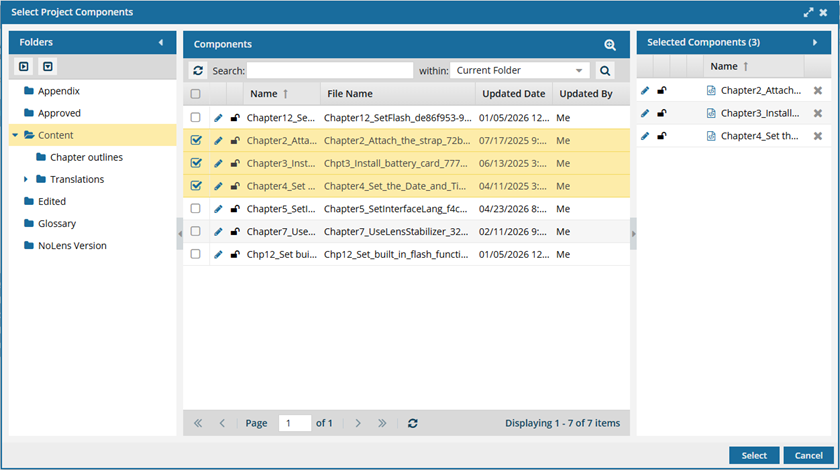
Select the component that you want to save as a new component.
 You can verify that you have the correct component by looking at the preview in the Content details pane. If the pane isn't open, click the down arrow in the pane's title bar. To see the complete name of the components and use advanced search to search through all folders within a project, click
  the Select Project Components option.
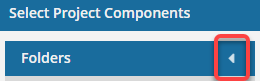
- To see more text in the Components pane, collapse the Folders panel by clicking
 the arrow that's pointing left.
 - To quickly expand or collapse the folders, use the expand all and
 collapse all buttons.
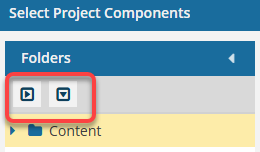
- To find a component by keyword, in Search, enter words or phrases used in the component's name. In Within, select where in the project you want to search (Current Folder, Current and Subfolders, All Folders). Click Search
 .
. - To find a component by creating a query, click
 Advanced Search.
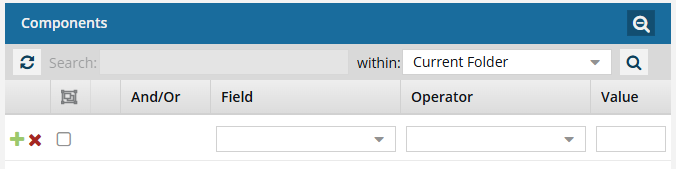
- Fields correspond to the columns in the grid. In the Field list, select the column you want to search in, such as Component State.
- After you select a Field, you must describe the relationship it has with the Value. In the Operator list, to include or exclude some or all of the values that you want to use, select an operator, such as
<>(not equal to). - The options in the Value list change depending on what you selected in Field. In the Value, select or enter the word, phrase, or number you are searching for in relation to the Field. For example, Component State (Field)
<>(Operator) Invalid (Value). - In Within, select where in the project you want to search (Current Folder, Current and Subfolders, All Folders).
- Optionally, to enter another clause to your query, click
 Add. Select whether you want to narrow your search by requiring that all statements must be true (And), or expand your search by requiring that any of the statements can be true (Or).
 - Click Search .
- To select multiple components to manage, select the checkbox for each component.
 Result: The components are listed on the Selected Components panel.
 - To close the Select Project Components screen, click Select
- To see more text in the Components pane, collapse the Folders panel by clicking
-
At the end of the row, click
 the Options menu and select Save As.
-
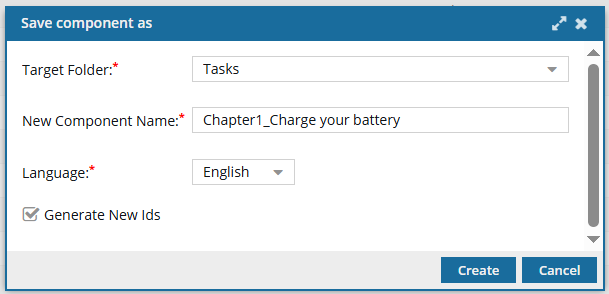
In the Save component as dialog, complete the following information.
-
From the Language list, select the default language for the component
Notes:
- The language you select is applied to the root level element in the xml:lang attribute.
- To ensure content that is read from Right-to-Left displays correctly in Oxygen, Inspire may set the Reading property.
- For the language you choose, if the language Reading property is rtl (Right-to-Left) and it doesn't exist yet, Inspire sets it.
- For example,
<concept id="concept_guid" xml:lang="ar-Ar" dir="rtl"> - Inspire makes no changes if the language Reading property is ltr (Left-to-Right)
- If necessary, an administrator can change the language after you create the component.
-
By default, the option to Generate New IDs for all elements in the source component is selected.
- If you leave this option selected, all elements are assigned a new ID even if the element didn't have one in the source component.
- If you clear this option, new IDs are not assigned. Elements will have the same IDs in the new component as in the source.
 Keep in mind that there are some cases where an ID won't be automatically created:
- An element is not supported
- An element has Skip Id set to true
- An element is NOT configured with the NeedsID identifier
- In the Oxygen editor, when you select
 Generate IDs, Inspire only puts a valid ID on elements if the NeedsId identifier is selected in their element configuration. Administrators can follow the steps in: Configure an element as NeedsID.
- In the Oxygen editor, when you select
-
From the Language list, select the default language for the component